
Script login endpoint configuration for Entra ID users
In this article you will learn how to configure your Entra ID to allow your employees to signin in a non interactive way. Useful for automation scenarios.
Prerequisites
You will need to have the Microsoft Entra ID integration completed https://help.enablemyteam.com/update/docs/microsoft-entra-id-integration#/.
You will also need an EMT account (which uses your corporate credentials) and the EMT Project URL.
If you want to run non interactive login script you will need admin consent to login to the application or you need to run the interactive login script first.
Configuration
Modify existing App registration
-
Find the "EMT ATLAS AIMS" Application created in this tutorial:
https://help.enablemyteam.com/update/docs/microsoft-entra-id-integration#/](https://help.enablemyteam.com/update/docs/microsoft-entra-id-integration#/).
-
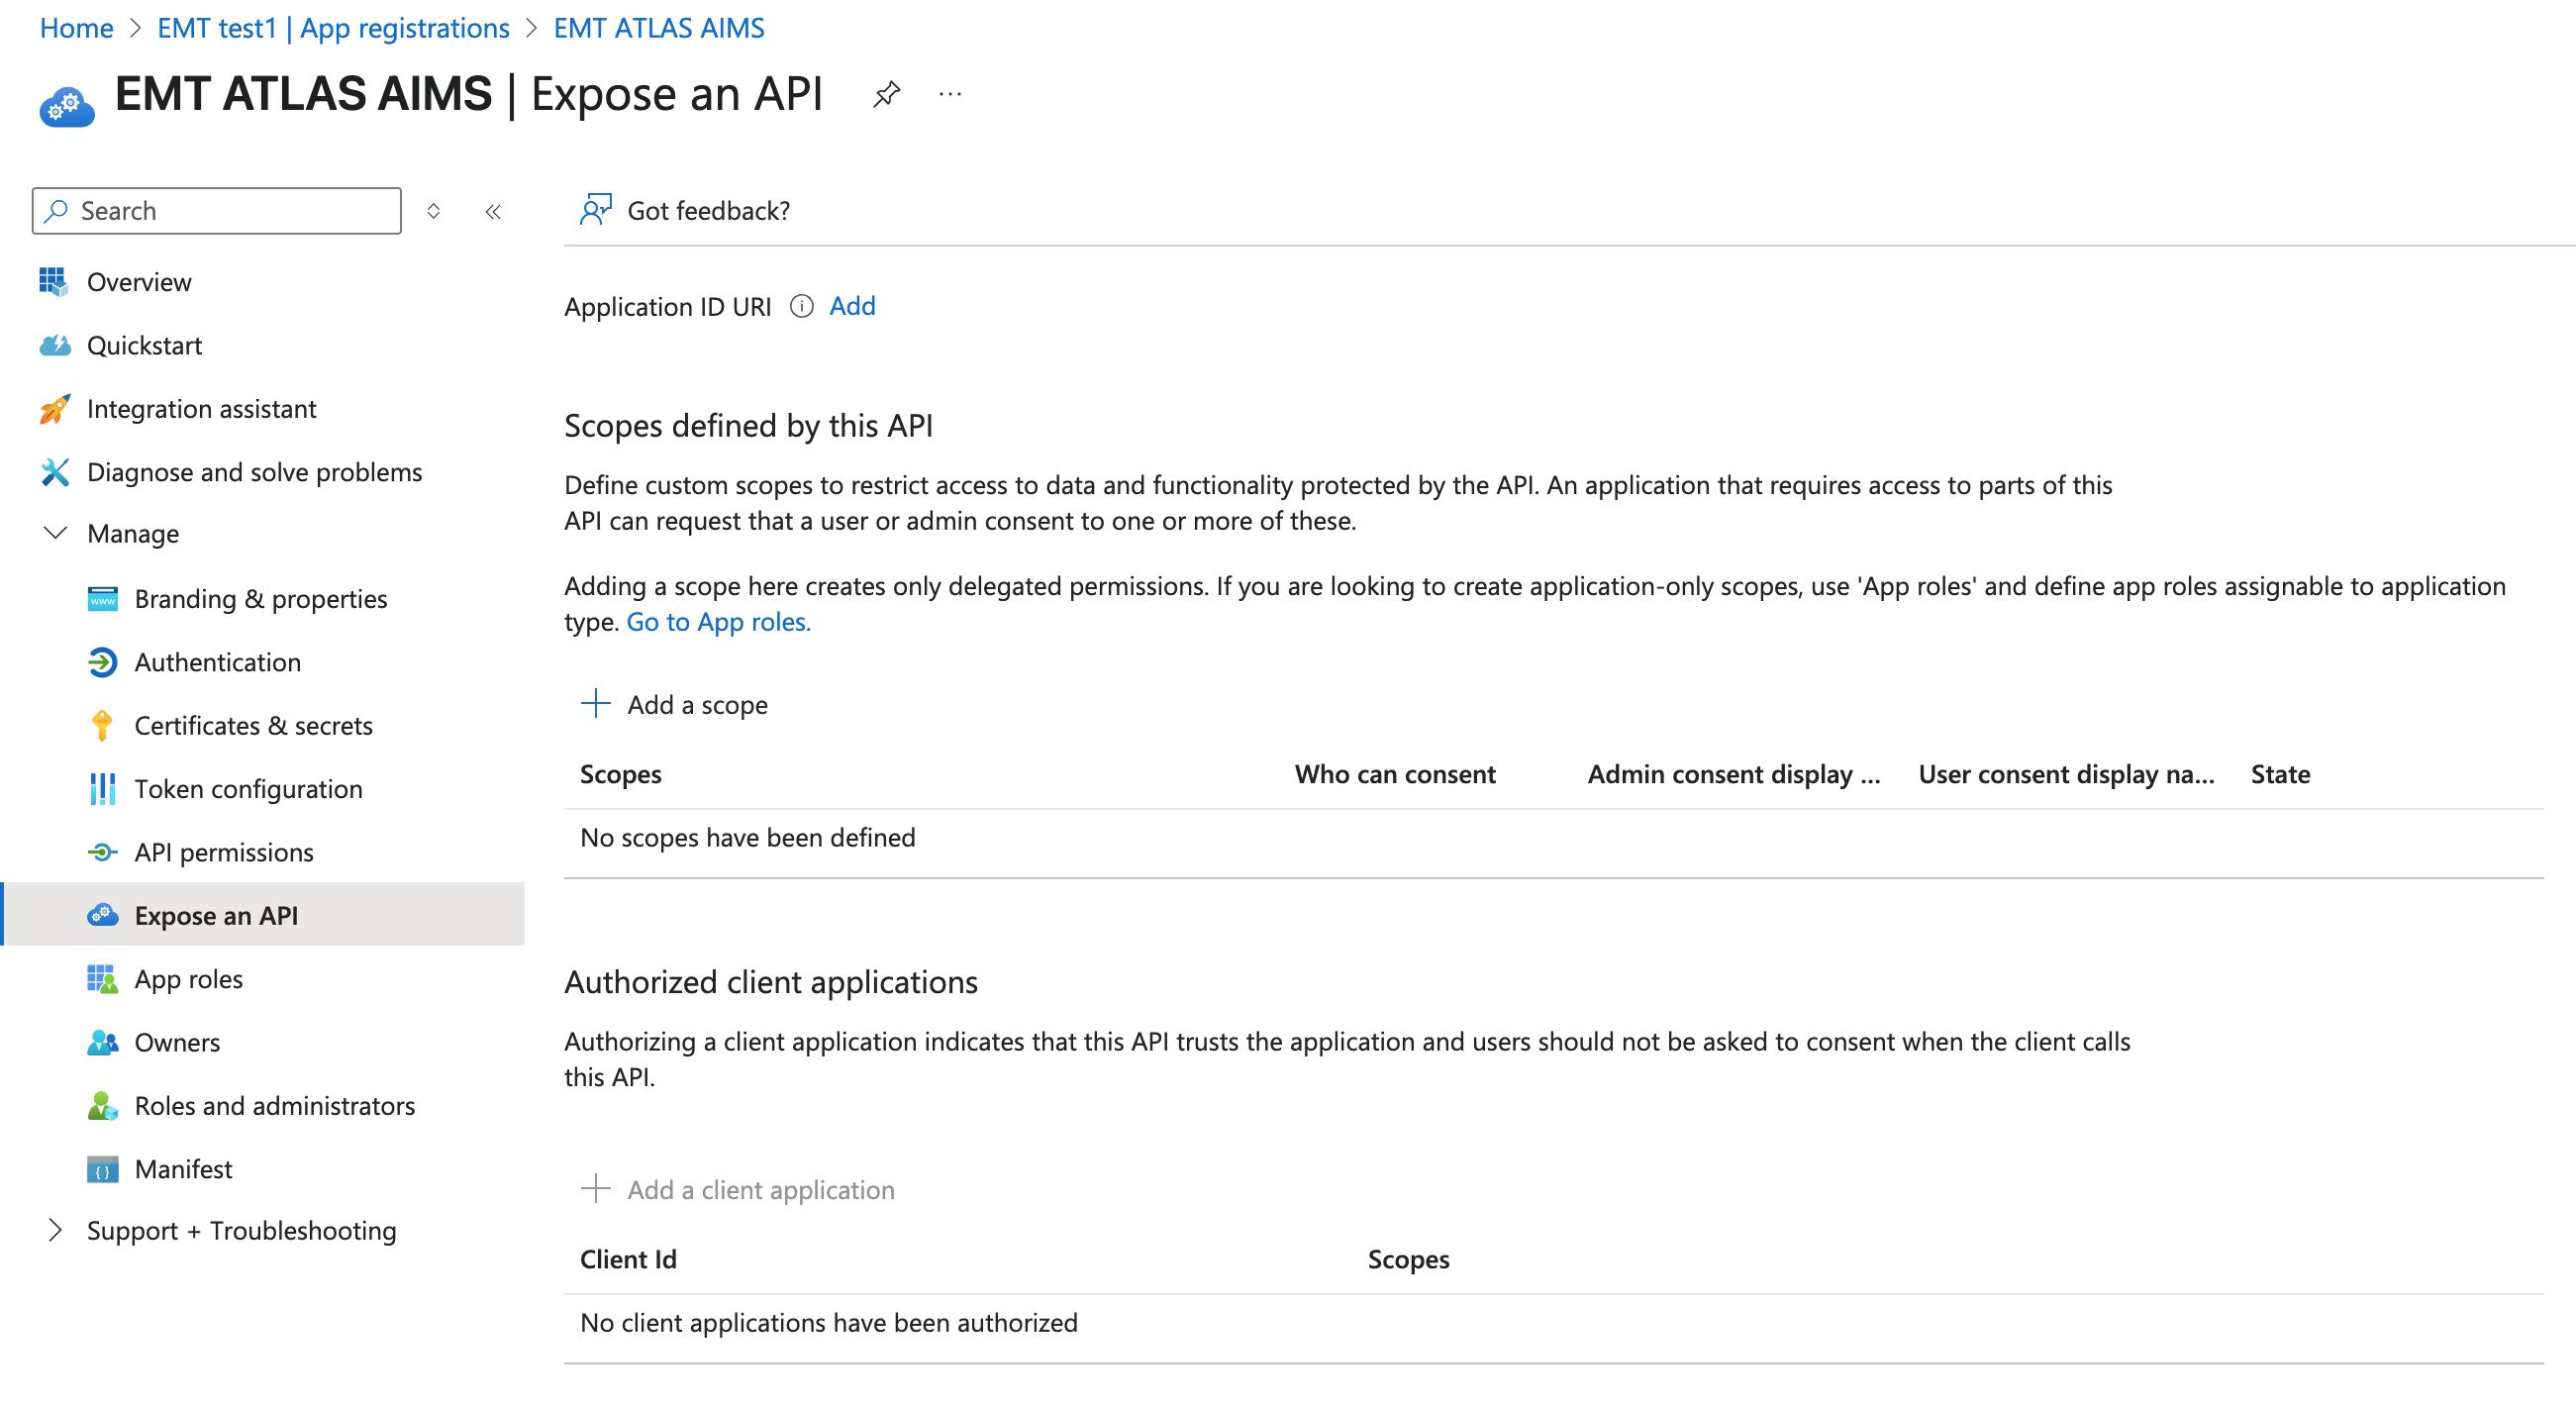
Go to "Manage" -> "Expose an API".
-
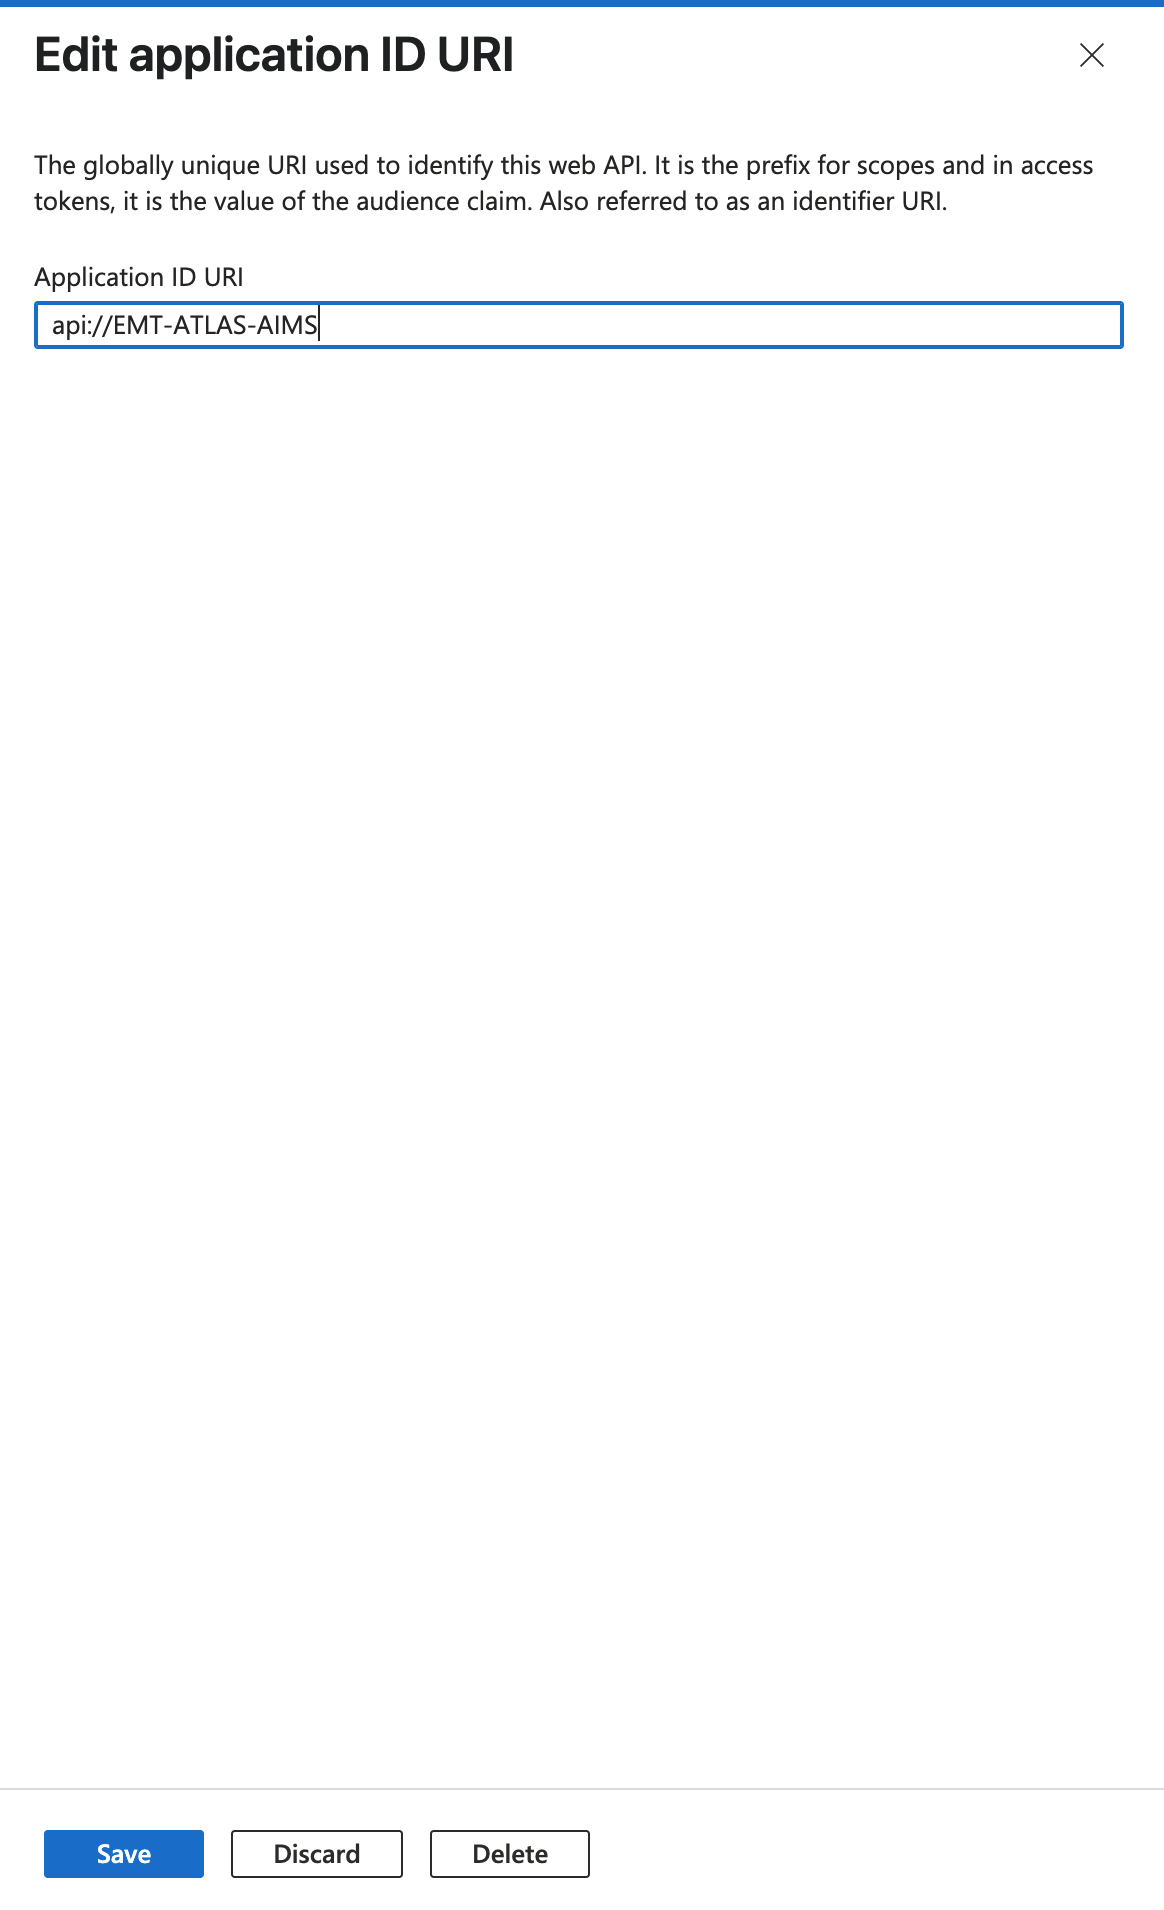
Click on "Add" next to "Application ID URI". Set the name to "api://EMT-ATLAS-AIMS". Next, click on Save.
-
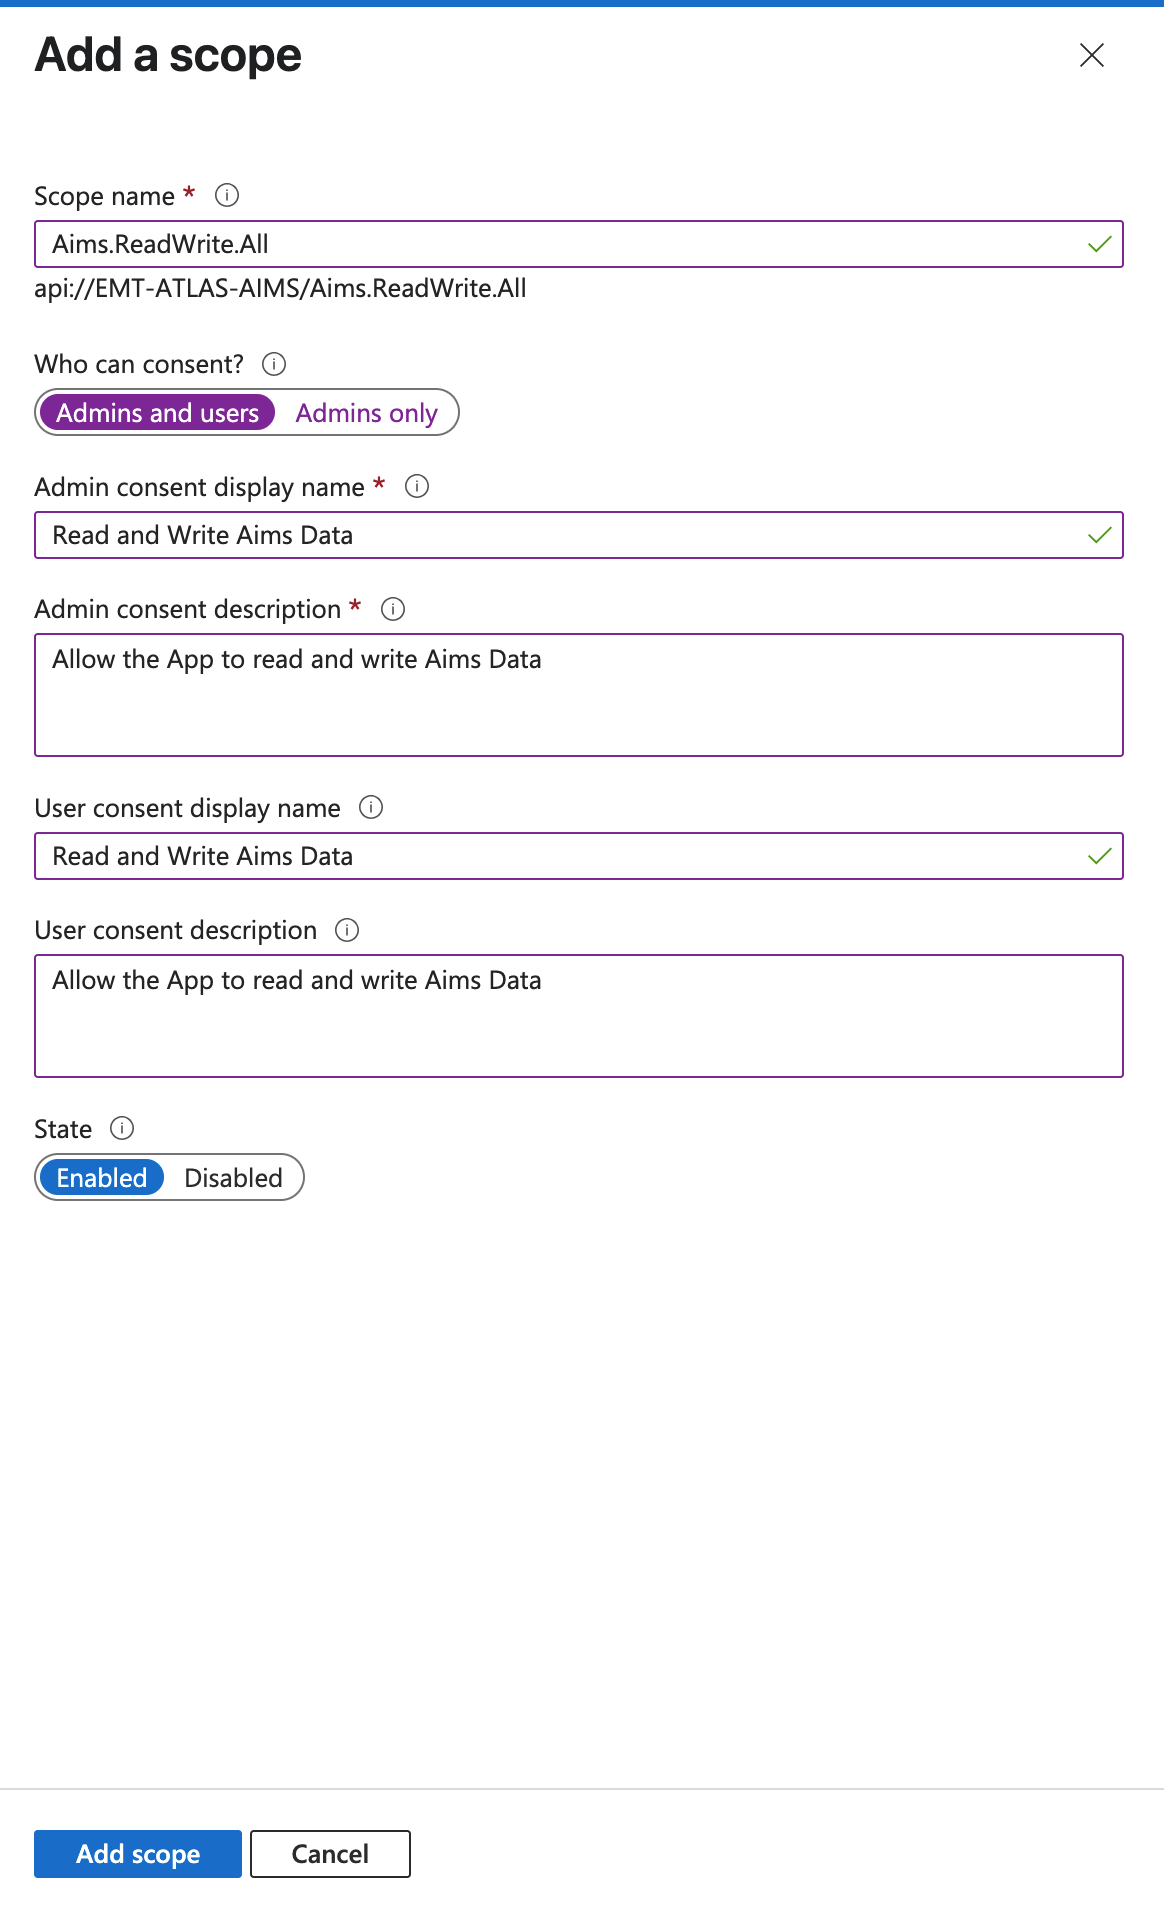
Click on "Add a scope". Use "Aims.ReadWrite.All" as scope name. Select "Admins and users" on "Who can consent?". Save it by clicking on "Add scope".
-
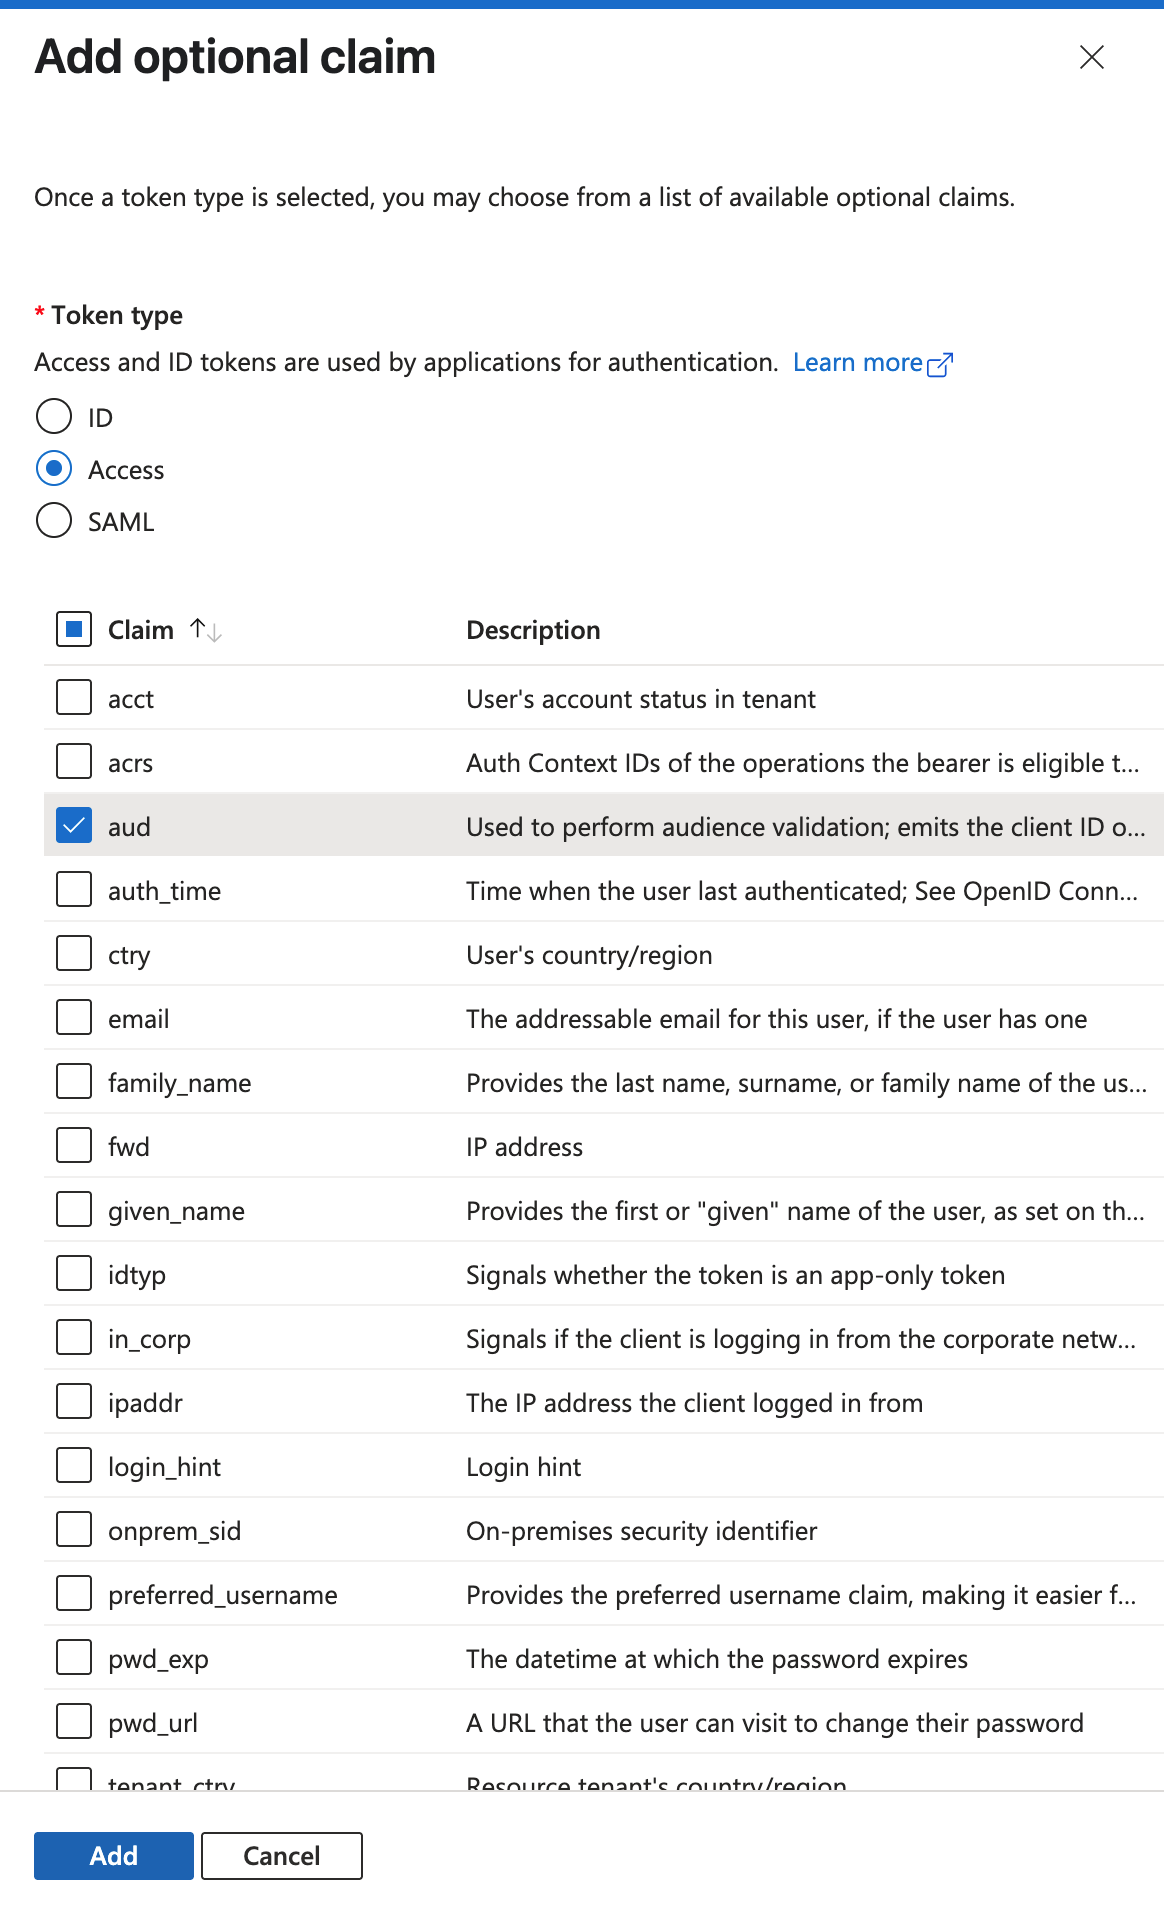
Now, go to the "Token configuration" section and click on "Add optional claim". Check the "aud" claim to the Access token. And click on "Add" to save it.
-
You can now proceed to the next part of the configuration.
Create new Console App registration
-
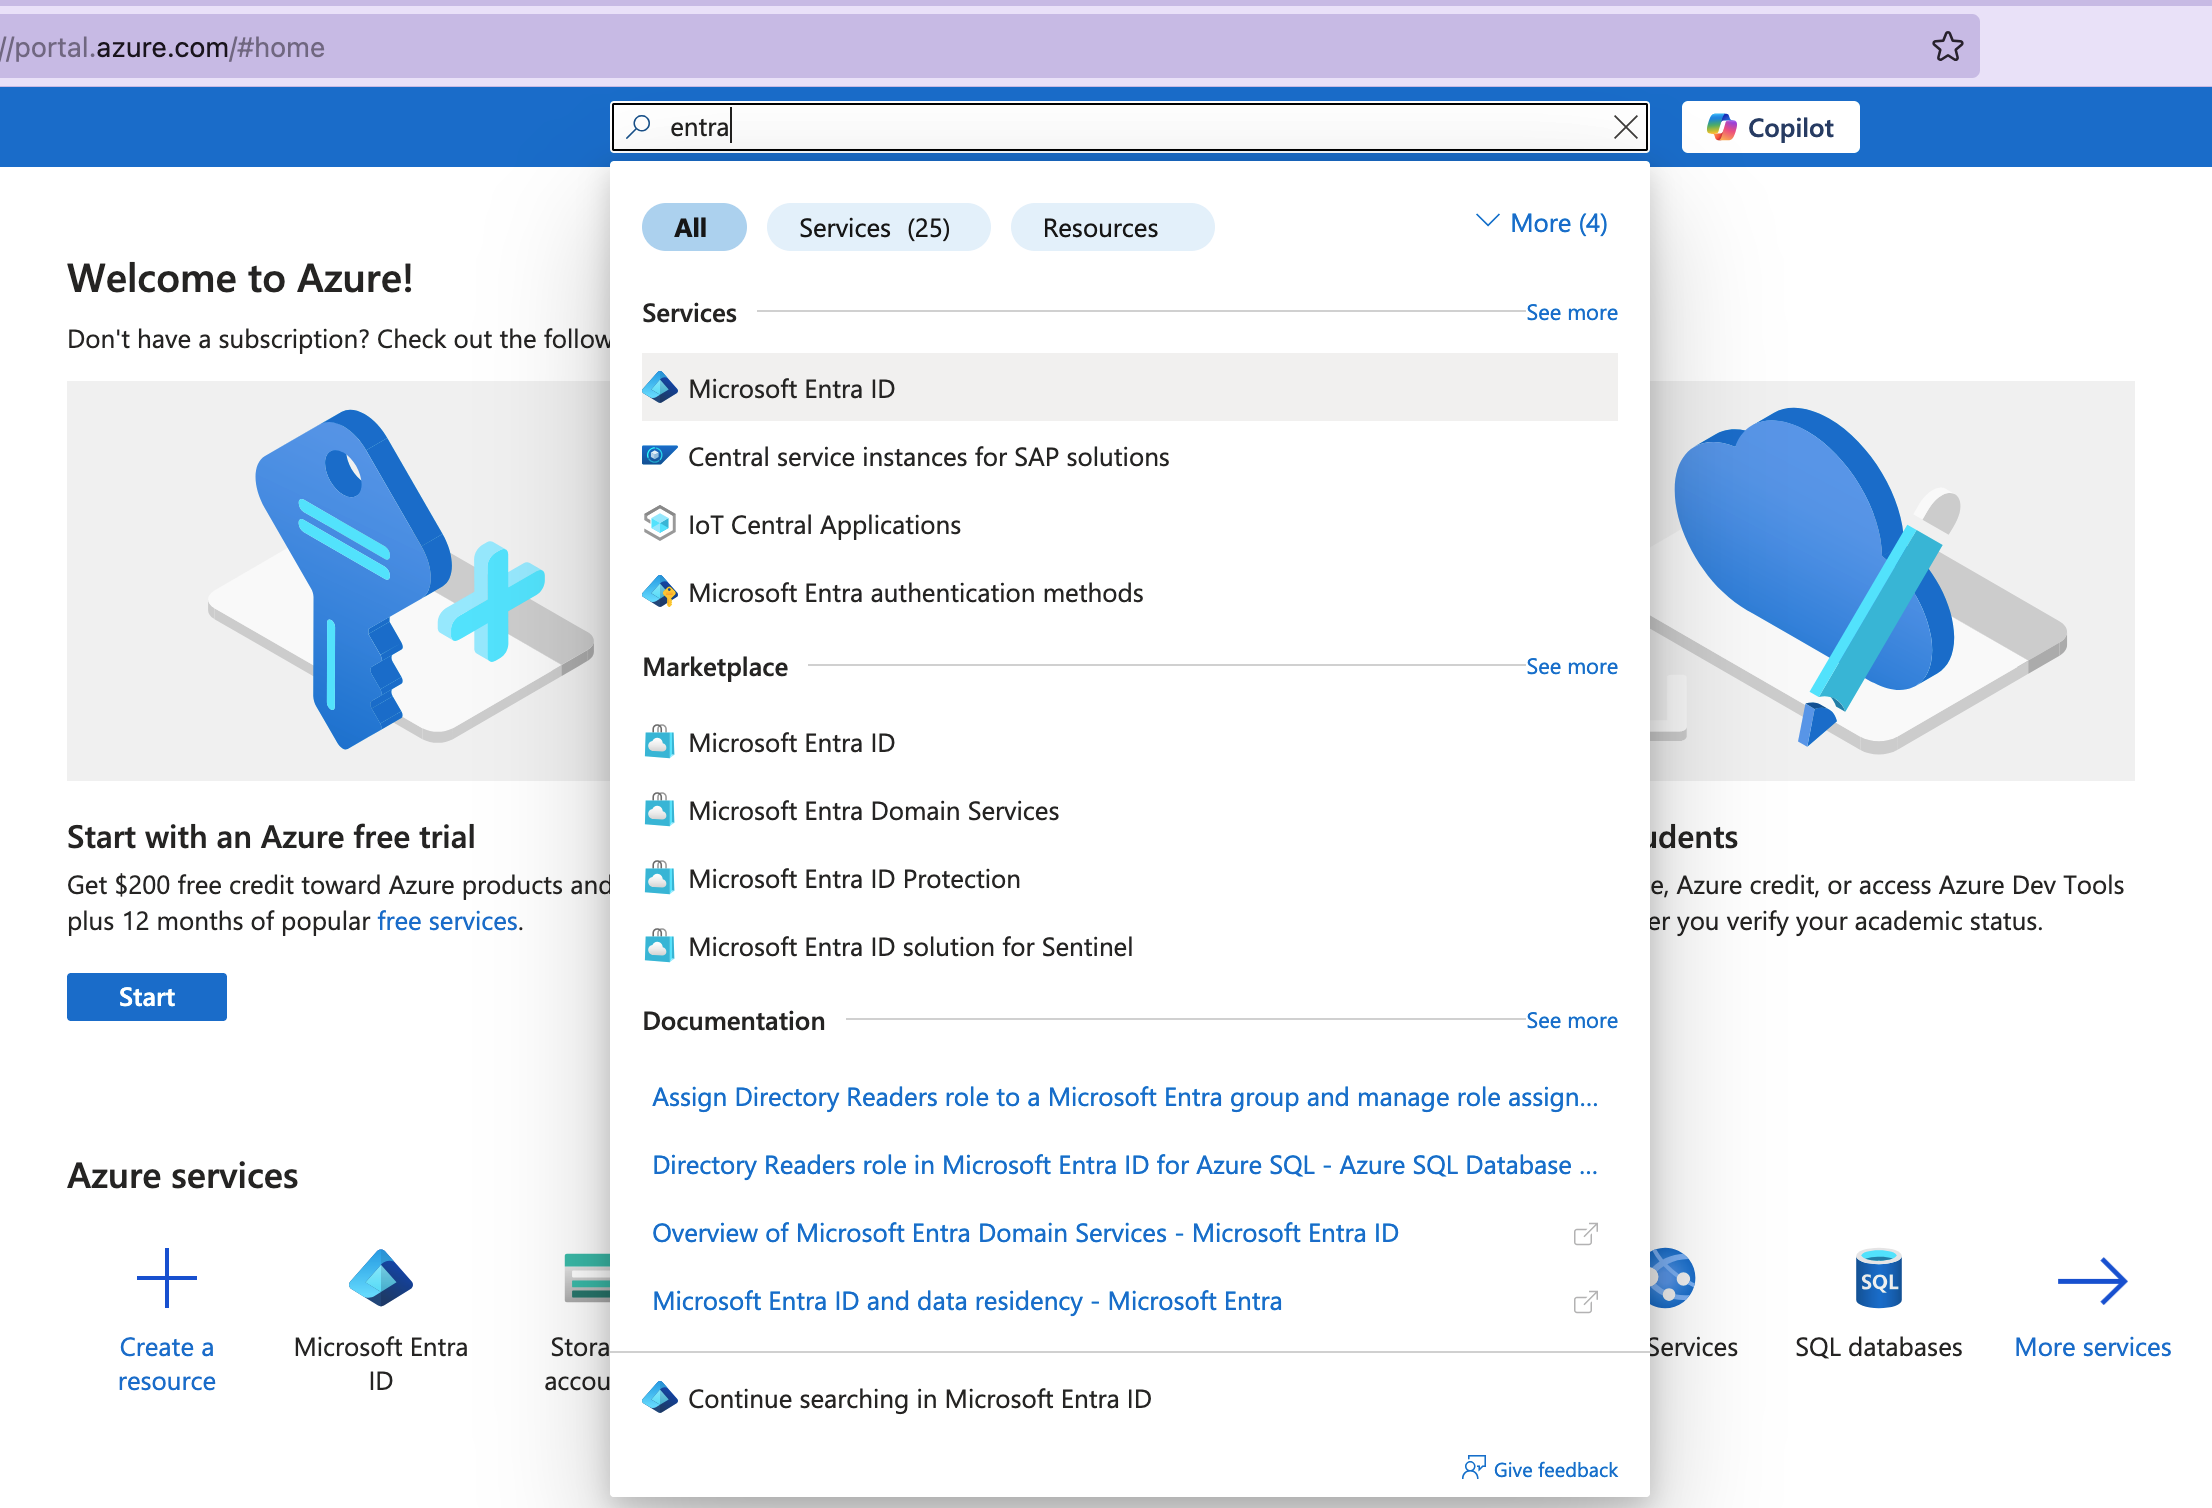
Go to Azure Portal and go to Entra ID You can access it using the search bar on top of the page.
-
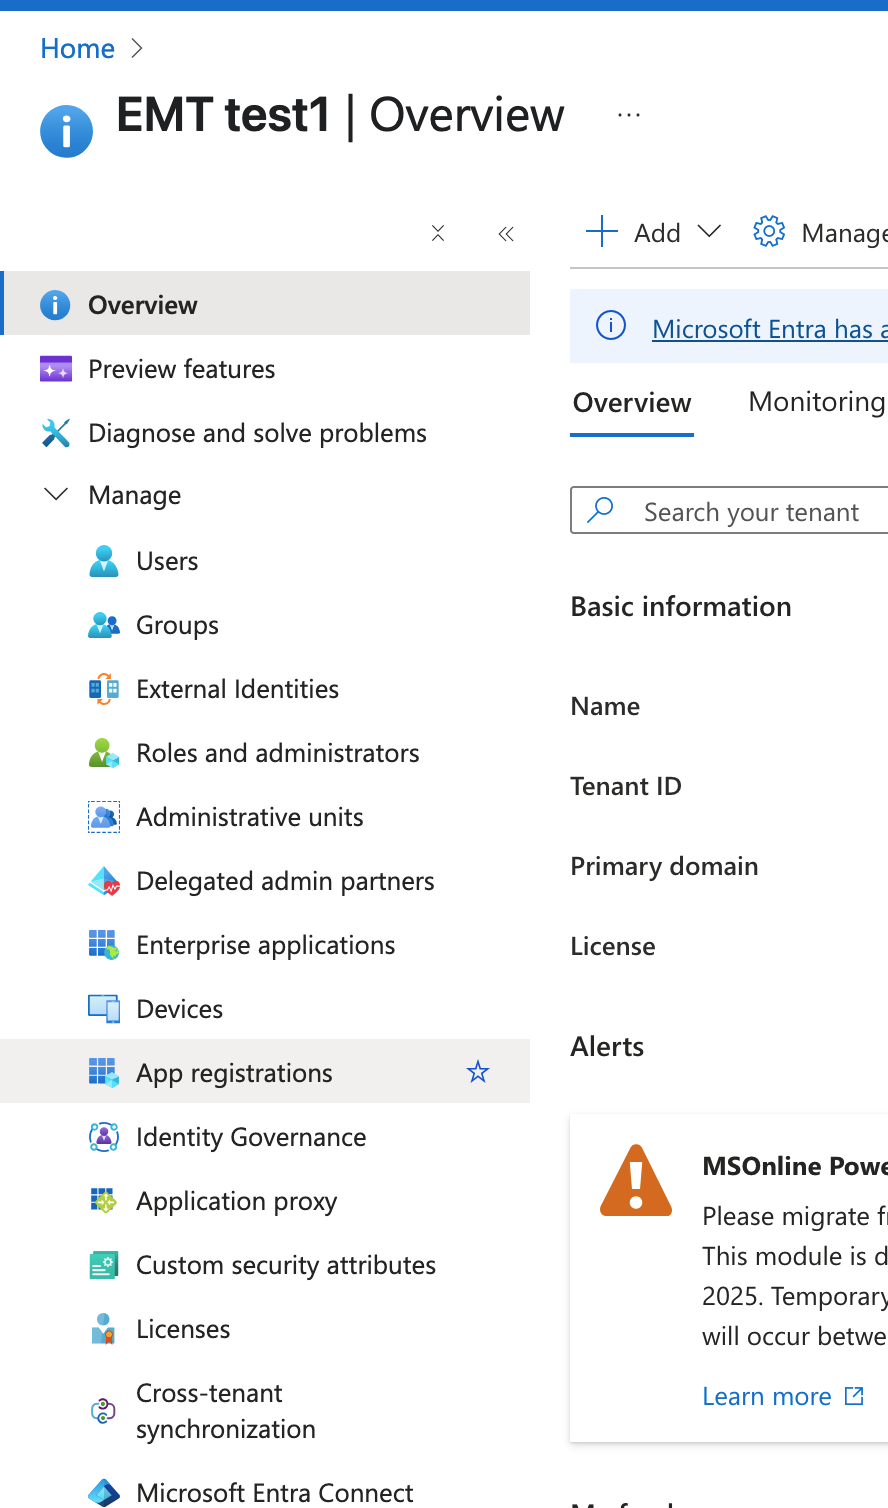
From Entra ID main page click on "Manage" and then "App registrations".
-
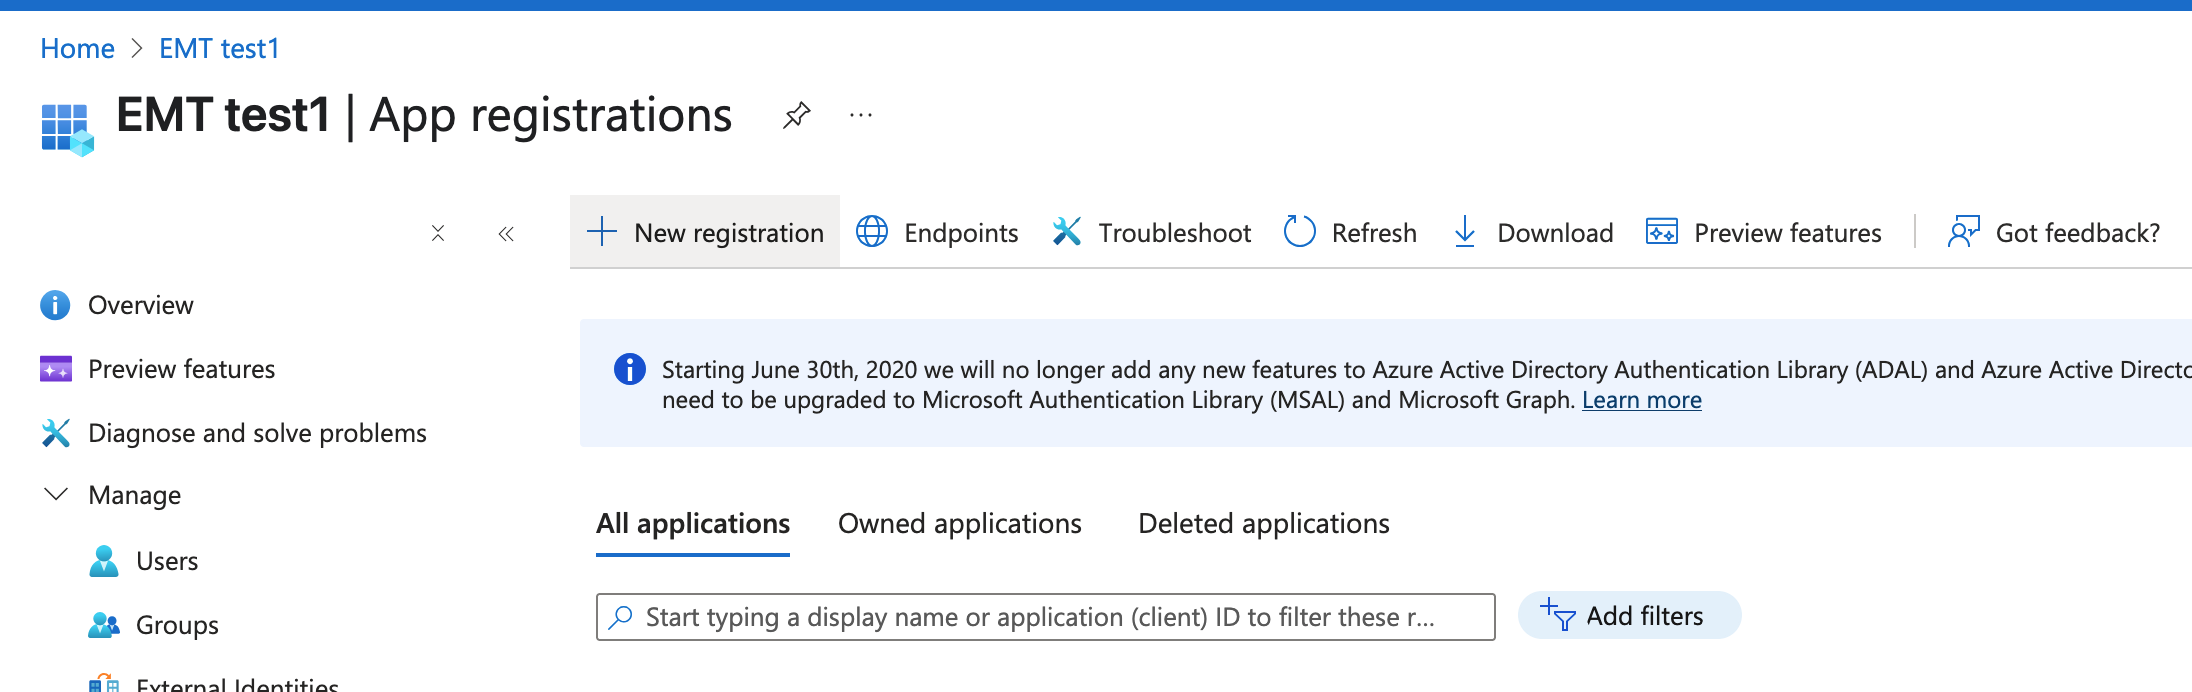
Click on "New Registration".
-
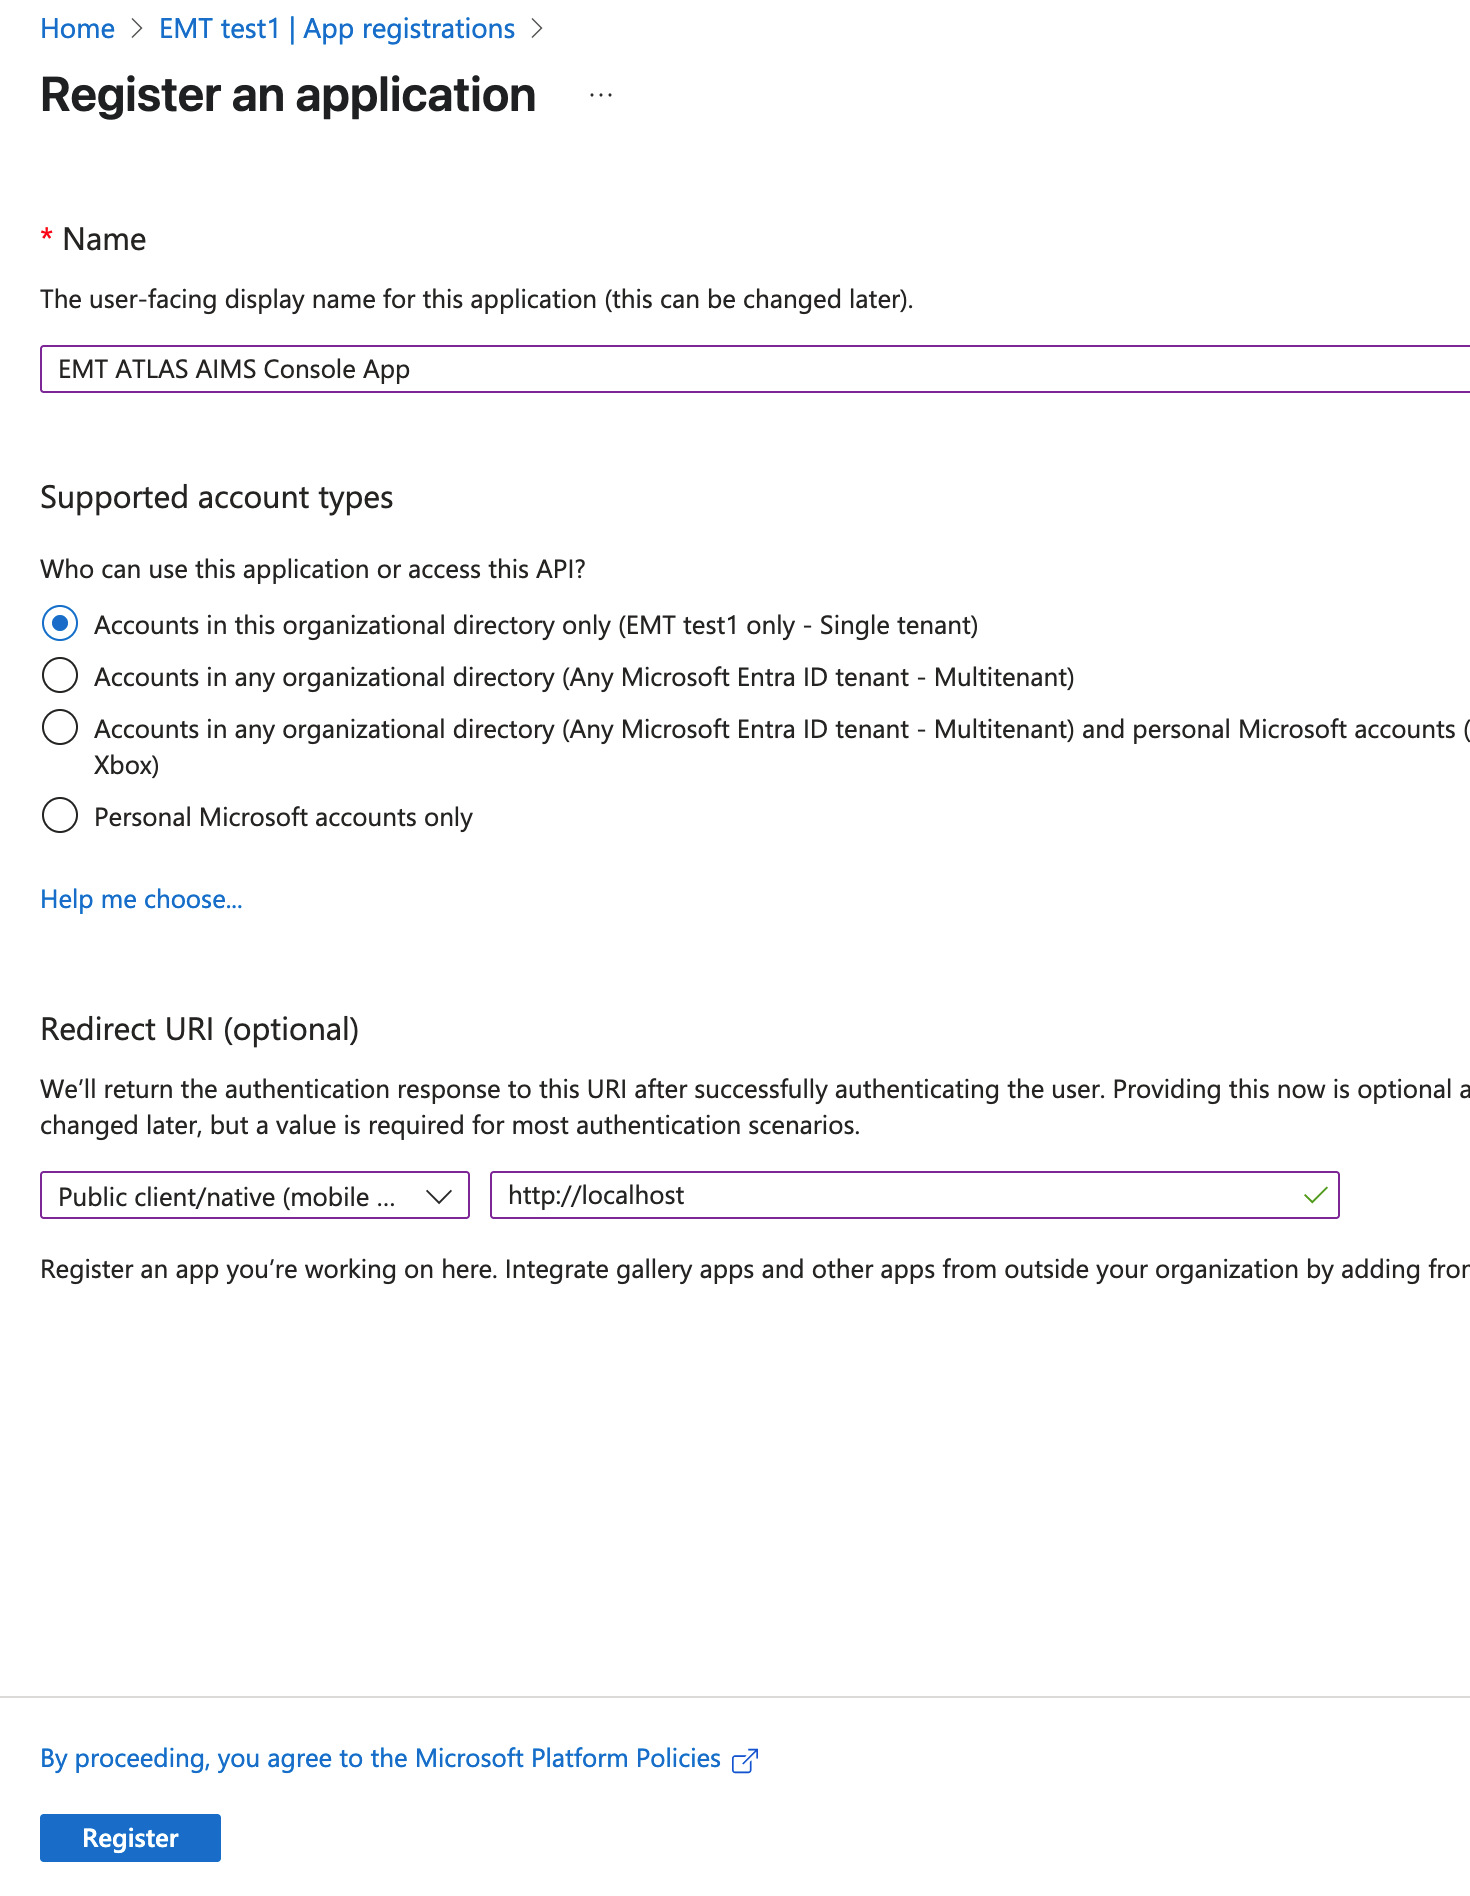
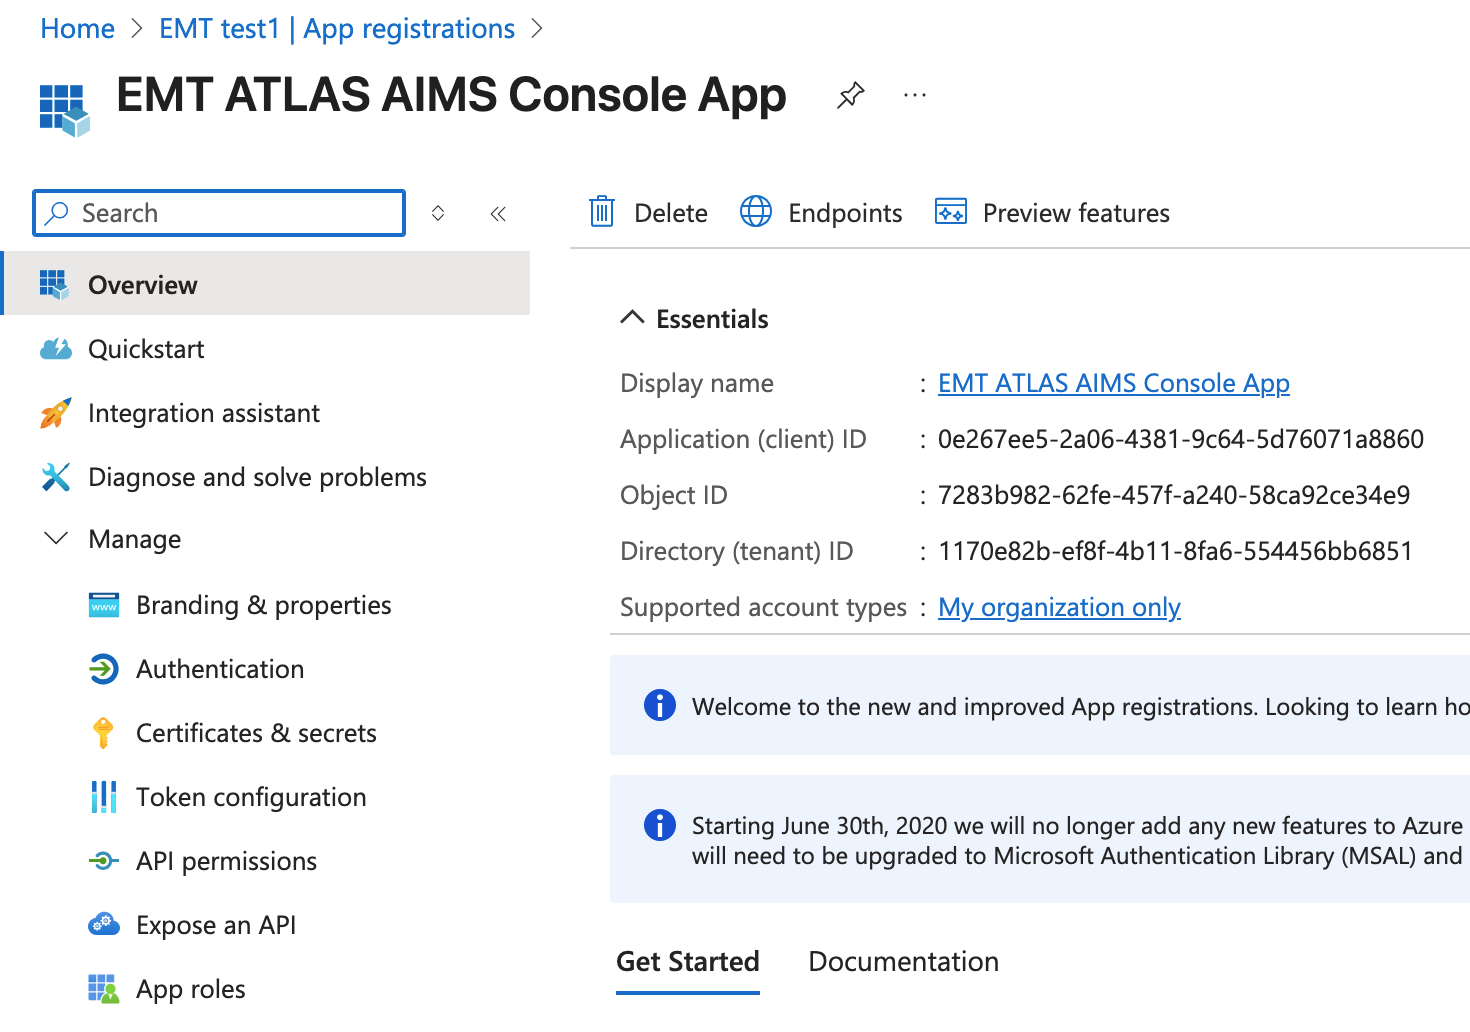
Select a name for the Application (e.g. "EMT ATLAS AIMS Console App").
-
For supported account types check: Accounts in this organizational directory only (Single tenant).
-
Select "Public client (mobile & desktop)" from the platform selection drop down.
-
Enter this Redirect URI: http://localhost.
-
Click on "Register".
-
Record the "Application (client) ID" and "Directory (tenant) ID" visible in the App Registration overview after creating the application. You will need them in later step.
-
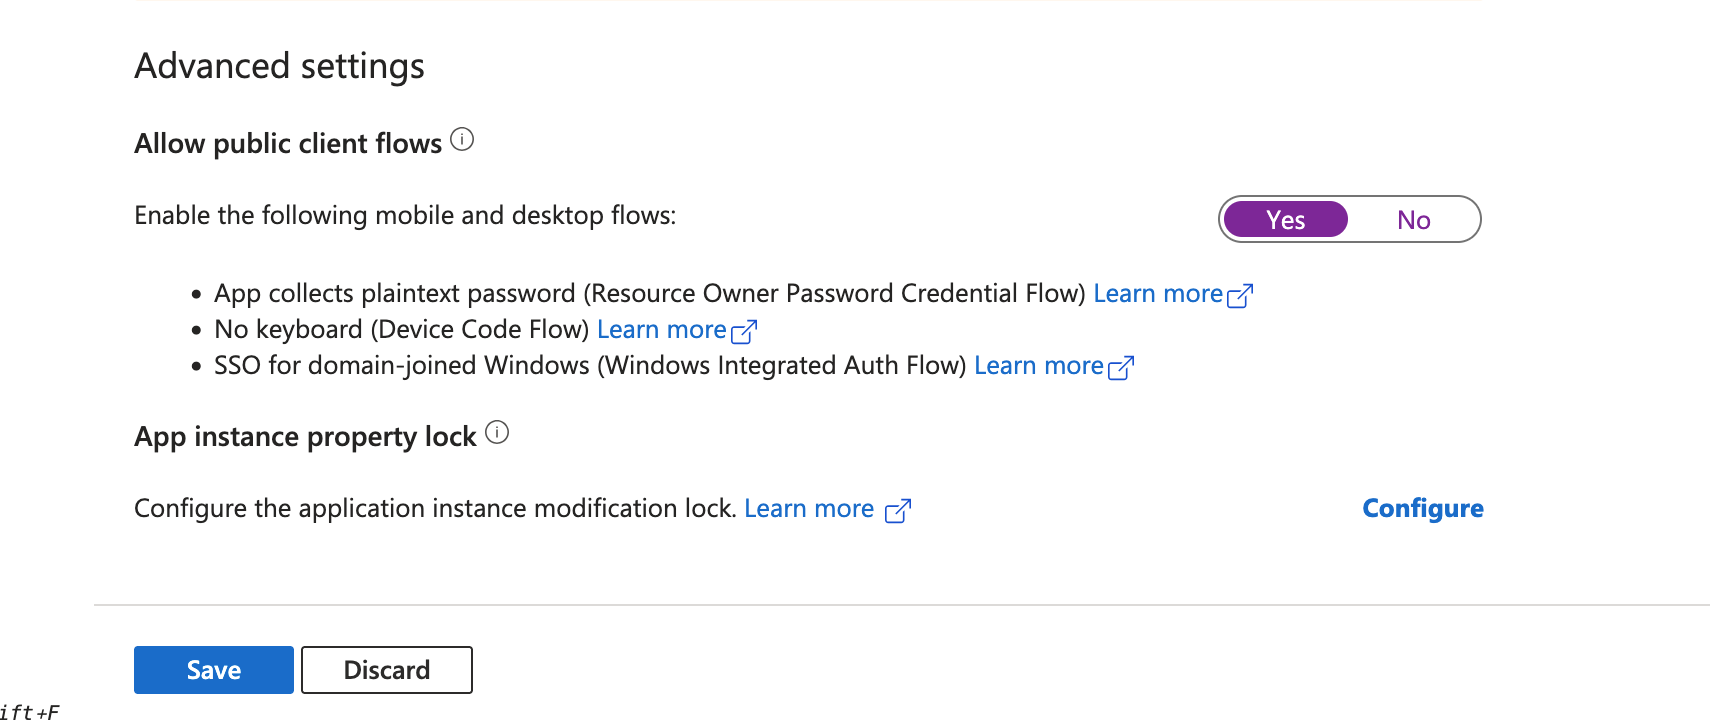
Go to "Authentication" and switch "Enable the following mobile and desktop flows:" to Yes. Then click on "Save" to save changes.
-
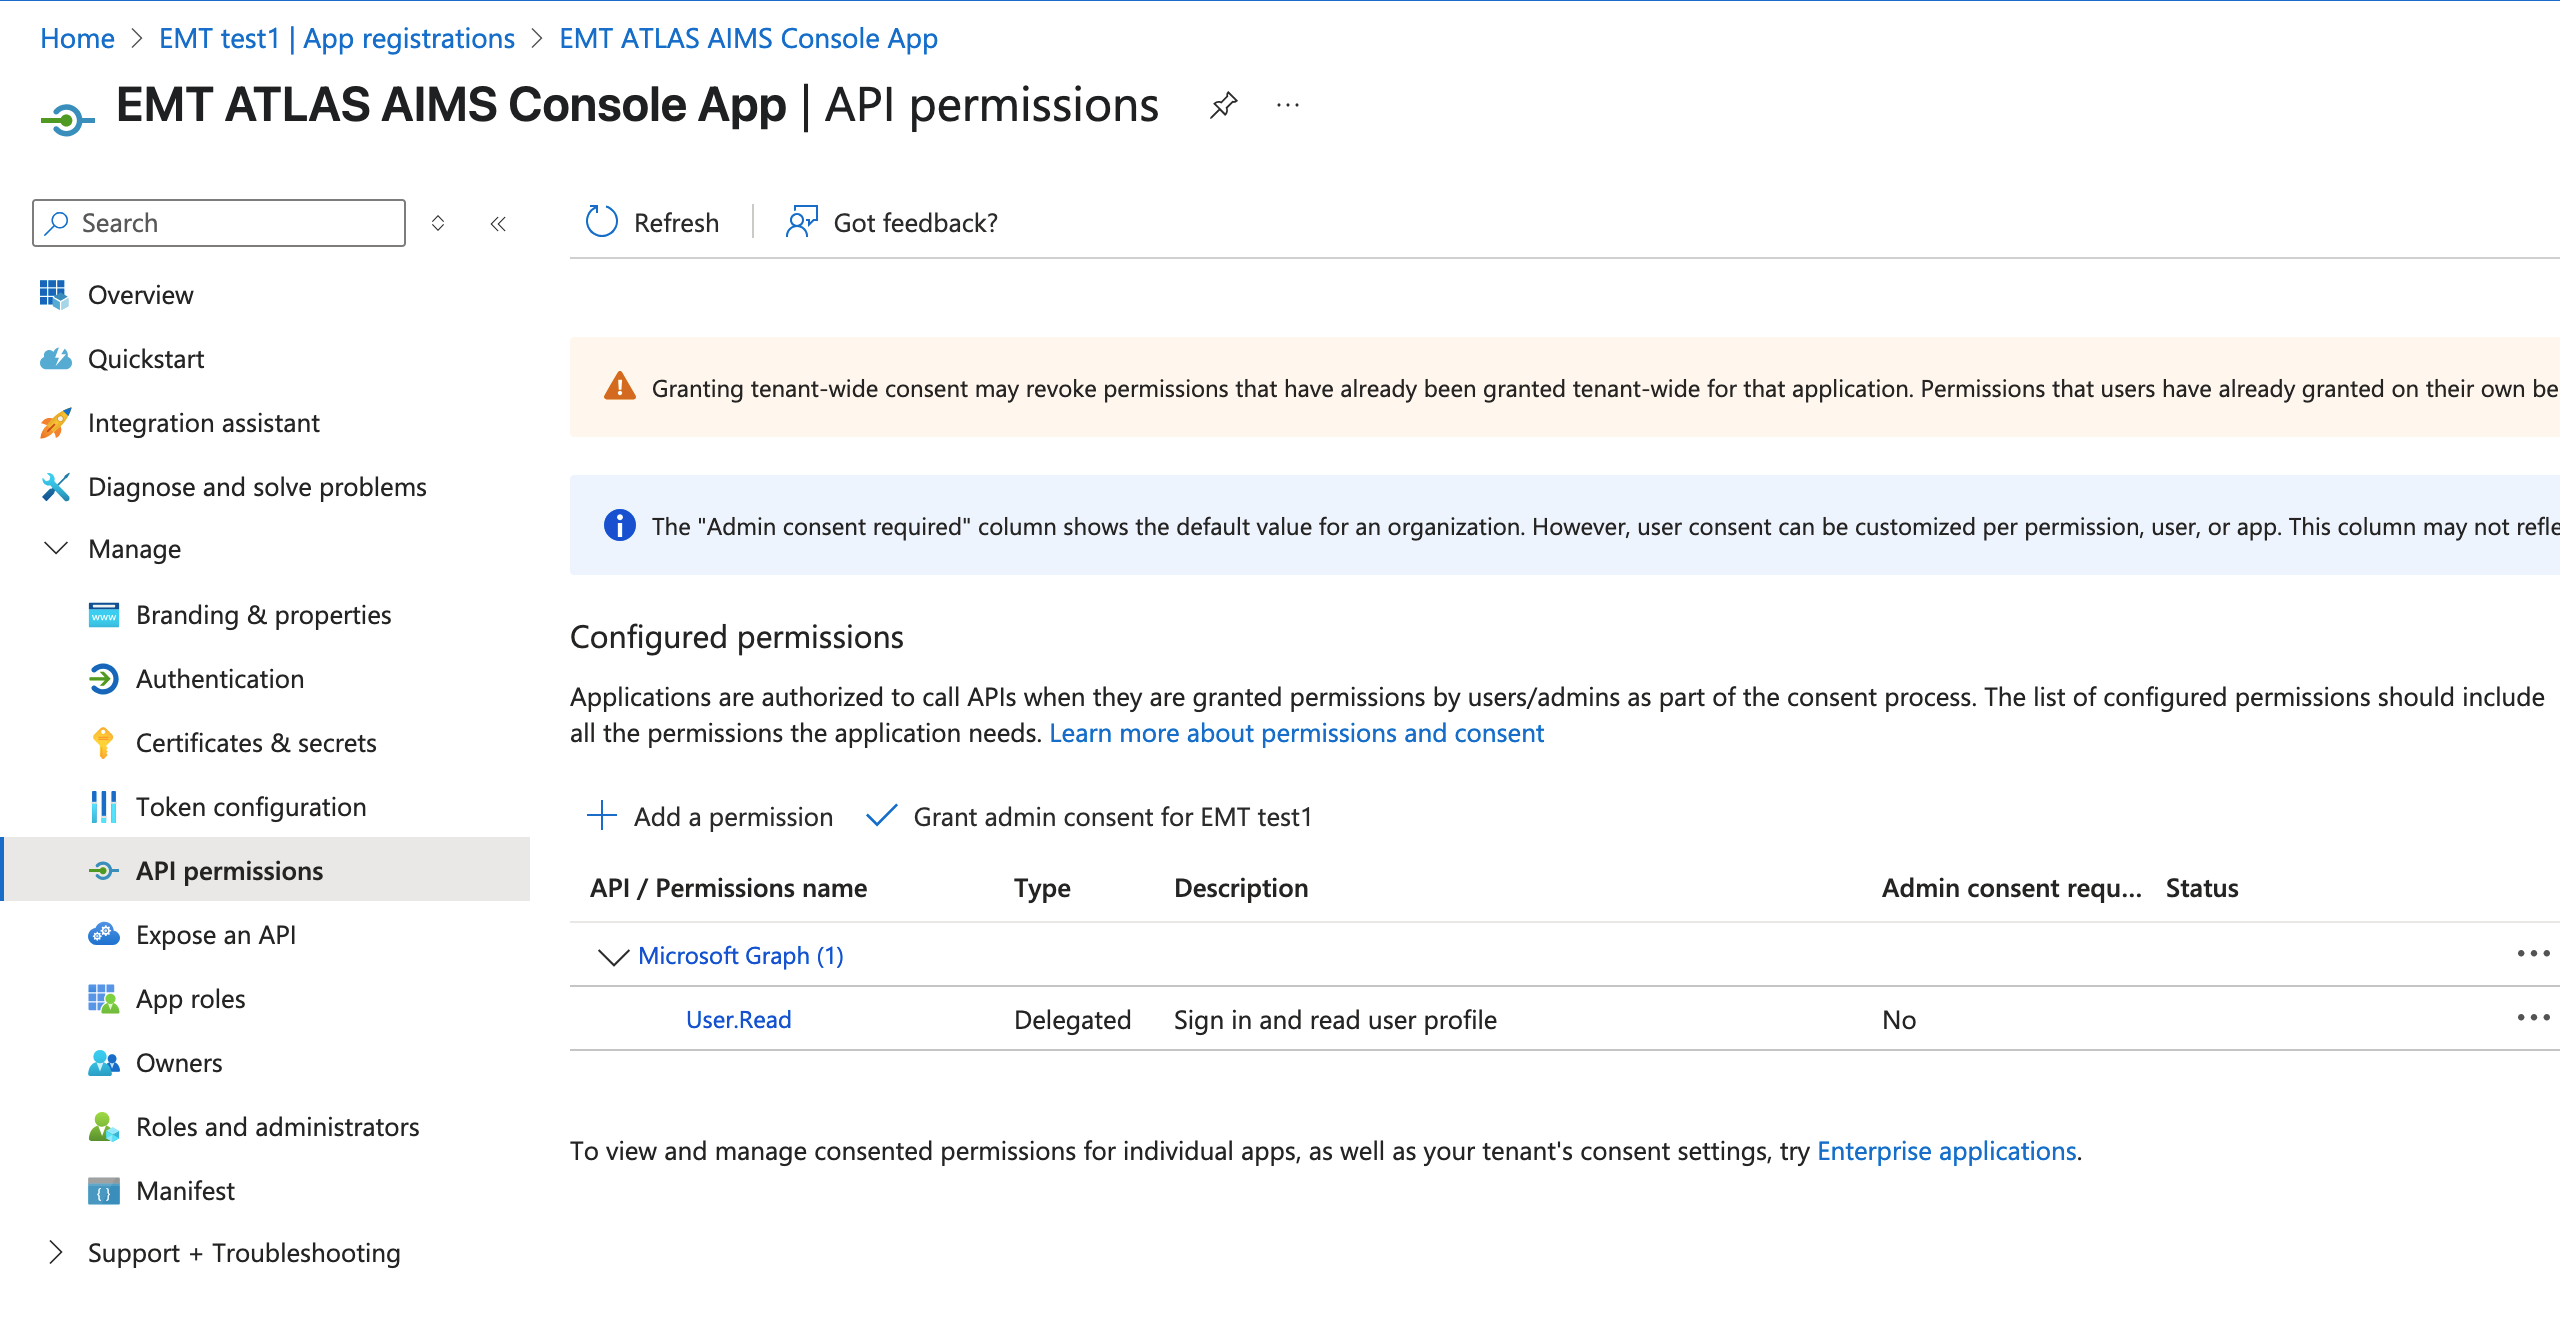
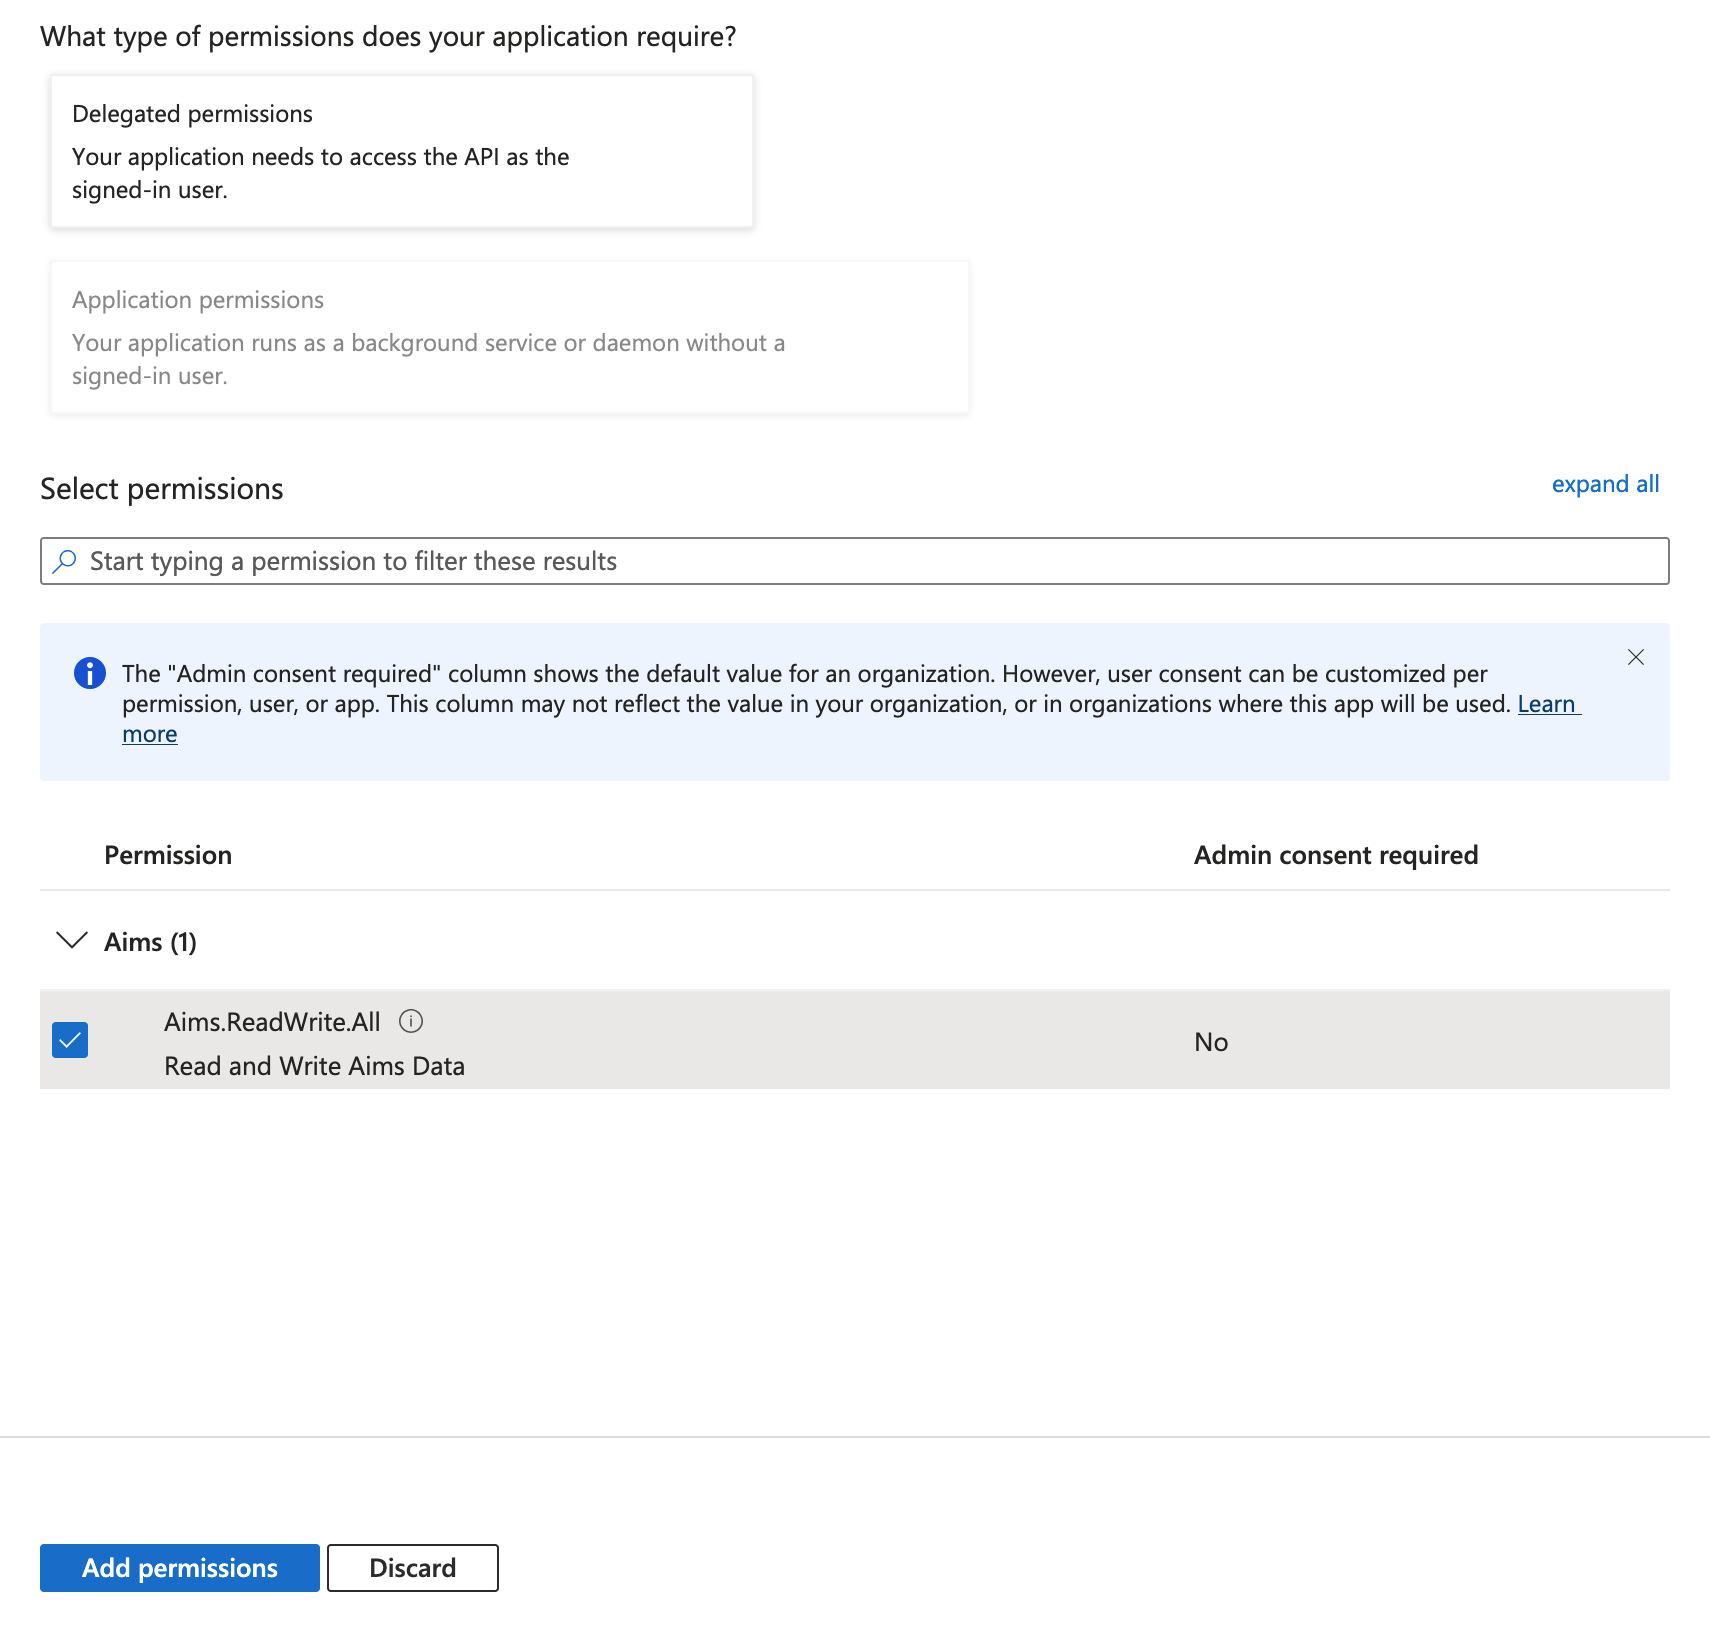
Go to "API Permissions" and click on "Add a permission".
-
Select "My APIs" and then click on "EMT ATLAS AIMS". Next check "Aims.ReadWrite.All" and save it by clicking on "Add permission". If the "EMT ATLAS AIMS" application does not show up. Wait for around 1 hour and then refresh the page.
-
Optionally you can click on "Grant admin consent for ...". This way users won't be prompted for consent when they signin to the application. This step is required if you'd like to run the non interactive login script without running the interactive login script first.
-
Contact EMT to enable the non interactive login endpoint for you.
-
You can now proceed to the next part where you will test the connection.
Run interactive login script
Prerequisites
- Python version 3 installed.
- Your EMT domain, tenantId and clientId recorded from earlier steps.
Running the script
- Copy and save this script as "login-interactive.py".
import urllib.request
import json
import argparse
import msal

def get_jwt_token(domain, ms_token):

    login_url = f"https://{domain}/aimsapi/login/jwt"
    login_payload = json.dumps({
        "token": ms_token
    }).encode('utf-8')
    headers = {'Content-Type': 'application/json'}

    request = urllib.request.Request(login_url, data=login_payload, headers=headers, method="POST")

    try:
        with urllib.request.urlopen(request) as response:
            data = json.loads(response.read().decode())
            print("Login successful!")
            return data.get("token")
    except urllib.error.HTTPError as e:
        print("Login failed!", e.read().decode())
        return None

def get_microsoft_token(tenantId, clientId):
    scope = ["api://EMT-ATLAS-AIMS/Aims.ReadWrite.All"]
    app = msal.PublicClientApplication(clientId, authority=f"https://login.microsoftonline.com/{tenantId}")

    result = app.acquire_token_interactive(scope, prompt=msal.Prompt.LOGIN)

    if 'access_token' in result:
        print("Access token obtained!")
        return result['access_token']
    else:
        print('Error obtaining token:')
        print(result.get('error'))
        print(result.get('error_description'))
        return

def get_user_data(domain, token):
    url = f"https://{domain}/aimsapi/user/user_data/"
    headers = {
        "Authorization": f"Bearer {token}",
        "Content-Type": "application/json"
    }
    request = urllib.request.Request(url, headers=headers, method="GET")

    try:
        with urllib.request.urlopen(request) as response:
            data = json.loads(response.read().decode())
            print("User Data:", data)
    except urllib.error.HTTPError as e:
        print("Failed to fetch user data!", e.read().decode())

def main():

    parser = argparse.ArgumentParser(description="Login interactive to EMT ATLAS AIMS")
    parser.add_argument("--domain", help="Your domain such as customer.enablemyteam.com or staging-customer.enablemyteam.com", required=True)
    parser.add_argument("--tenantId", help="Your tenant id (Microsoft Entra Directory ID)", required=True)
    parser.add_argument("--clientId", help="Client ID (Application ID) of the EMT ATLAS AIMS Application Registration from you Microsoft Entra ID", required=True)

    args = parser.parse_args()

    domain = args.domain
    clientId = args.clientId
    tenantId = args.tenantId

    ms_token = get_microsoft_token(tenantId, clientId)
    if ms_token:
        jwt_token = get_jwt_token(domain, ms_token)
        if jwt_token:
            get_user_data(domain, jwt_token)

if __name__ == "__main__":
    main()
- Create a virtual environment.
python -m venv emt-venv
source emt-venv/bin/activate
python -m pip install msal- Run the script.
python login-interactive.py --domain {yourEMTdomain} --tenantId {yourTenantId} --clientId {yourClientId}- A browser window with a login page should open. After logging in you should see a message in the terminal saying "Login succesful!" and the user data.
Run non interactive login script
Prerequisites
- Python version 3 installed.
- Your EMT domain, tenantId and clientId recorded from earlier steps.
Running the script
- Copy and save this script as "login-non-interactive.py".
import urllib.request
import json
import argparse

def get_jwt_token(domain, ms_token):

    login_url = f"https://{domain}/aimsapi/login/jwt"
    login_payload = json.dumps({
        "token": ms_token
    }).encode('utf-8')
    headers = {'Content-Type': 'application/json'}

    request = urllib.request.Request(login_url, data=login_payload, headers=headers, method="POST")

    try:
        with urllib.request.urlopen(request) as response:
            data = json.loads(response.read().decode())
            print("Login successful!")
            return data.get("token")
    except urllib.error.HTTPError as e:
        print("Login failed!", e.read().decode())
        return None

def get_microsoft_token(tenantId, clientId, email, password):
    url = f"https://login.microsoftonline.com/{tenantId}/oauth2/v2.0/token"
    payload = urllib.parse.urlencode({
        "client_id": clientId,
        "username": email,
        "password": password,
        "grant_type": "password",
        "scope": "openid api://EMT-ATLAS-AIMS/Aims.ReadWrite.All"
    }).encode('utf-8')
    headers = {
        "Content-Type": "application/x-www-form-urlencoded"
    }
    request = urllib.request.Request(url, data=payload, headers=headers, method="POST")

    try:
        with urllib.request.urlopen(request) as response:
            data = json.loads(response.read().decode())
            print("Microsoft token retrieved successfully!")
            return data.get("access_token")
    except urllib.error.HTTPError as e:
        print("Failed to retrieve Microsoft token!", e.read().decode())
        return None

def get_user_data(domain, token):
    url = f"https://{domain}/aimsapi/user/user_data/"
    headers = {
        "Authorization": f"Bearer {token}",
        "Content-Type": "application/json"
    }
    request = urllib.request.Request(url, headers=headers, method="GET")

    try:
        with urllib.request.urlopen(request) as response:
            data = json.loads(response.read().decode())
            print("User Data:", data)
    except urllib.error.HTTPError as e:
        print("Failed to fetch user data!", e.read().decode())

def main():
    email = input("Enter your email: ")
    password = input("Enter your password: ")

    parser = argparse.ArgumentParser(description="Login non interactive to EMT ATLAS AIMS")
    parser.add_argument("--domain", help="Your domain such as customer.enablemyteam.com or staging-customer.enablemyteam.com", required=True)
    parser.add_argument("--tenantId", help="Your tenant id (Microsoft Entra Directory ID)", required=True)
    parser.add_argument("--clientId", help="Client ID (Application ID) of the EMT ATLAS AIMS Application Registration from you Microsoft Entra ID", required=True)

    args = parser.parse_args()

    domain = args.domain
    clientId = args.clientId
    tenantId = args.tenantId

    ms_token = get_microsoft_token(tenantId, clientId, email, password)
    if ms_token:
        jwt_token = get_jwt_token(domain, ms_token)
        if jwt_token:
            get_user_data(domain, jwt_token)

if __name__ == "__main__":
    main()
- Run the script.
python login-non-interactive.py --domain {yourEMTdomain} --tenantId {yourTenantId} --clientId {yourClientId}- When prompted enter your email and password.
- You should see a message in the terminal saying "Login succesful!" and the user data.
Updated about 1 year ago