
Microsoft Power BI Connector
How to install our Power BI connector for Documents or Assets data
This connector will allow for up to 100,000 rows of data to be returned.If larger data is required, please discuss with your EMT contact.
Download
Download our connector files from here:
EMT Documents and EMT Assets Power BI Connector
Installation
-
Unzip the downloaded file
-
Go to the release folder
-
Within the extracted folder, navigate to the desired environment folder (Production or Staging)
-
Within the chosen folder run the 'install-script.bat' file as an administrator
-
When the console window opens, press any button as instructed

-
The console window will close and the necessary connector files will have been copied to the necessary directory
Using the Connectors
Use a Report Template
View our Report Templates page to download and use one of our pre-built report templates: Report Templates
Build a Report from Scratch
-
Open Power BI Desktop
-
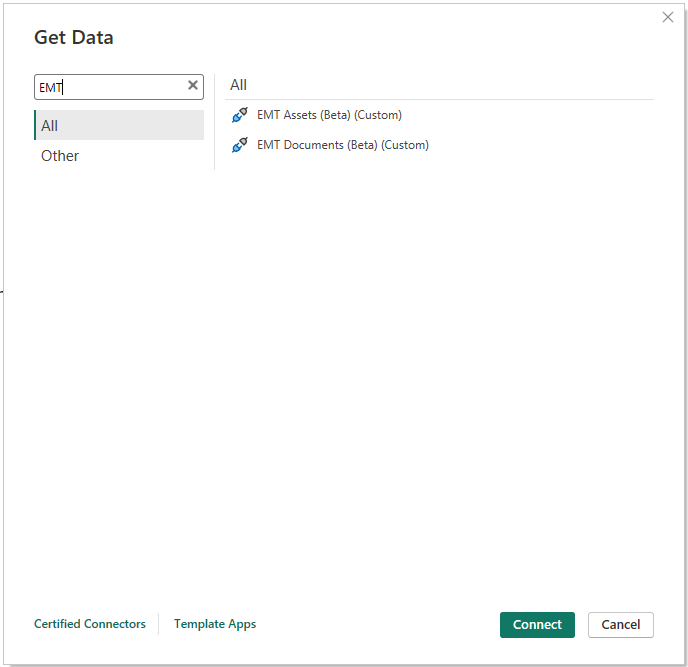
Under Get Data, search for 'EMT' and you should see two options
- EMT Assets (Beta) (Custom)
- EMT Documents (Beta) (Custom)
-
Select our desired data set, click Connect
-
Click 'Continue' upon the 'Connection to a third-party service' prompt
-
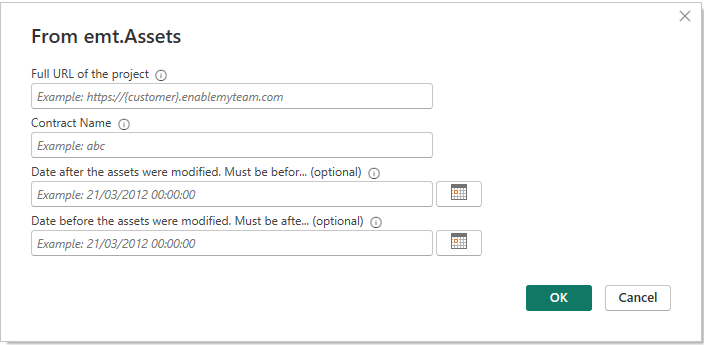
Within the credentials dialog window, enter the necessary credentials
-
Full URL of the project - this is the full domain you use for EMT ATLAS
e.g. https://{customer}.enablemyteam.com -
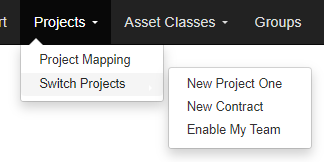
Contract Name - this is the name of the contract to retrieve data from, you can find your available contracts witin EMT under the Projects > Switch Projects, menu
-
(Optional) Set the date modified from, for which you want to retrieve data
A maximum of 100,000 assets will be returned from the date specified. Newest to oldest. -
(Optional) Set the date modified upto, for which you want to retrieve data
A maximum of 100,000 assets will be returned upto the date specified. Newest to oldest. -
If no optional dates are specified, up to a maximum of 100,000 assets will be returned from newest to oldest.
-
-
Click OK
-
The data tables will then be loaded into Power BI and can be used within the production of reports
Updated 4 months ago