
Model Sectioning
Model sectioning can be used to isolate a specific section of a model and share this detail with other users.
Sectioning
Creating a Section View
- Click on the Sectioning tool:

-
Following the on screen prompts at the top of the view window, click upon a model element to bring up the sectioning cube. By default the sectioning will start in 'Editable' mode.
-
To Rotate the section cube, select 'Rotate' along the bottom of the view, then click upon the rotation axis around which you wish to rotate.
-
Click and drag the cube to rotate it.

-
To adjust the size of the section cube, click on 'Move' along the bottom of the view, then click and drag the faces of the cube to move them to the desired position.
-
When you have the section required, click upon 'Readonly' along the bottom of the view. This will prevent any unintentional edits.
Saving a Section View
-
Once you have your desired section, click on 'Create Camera View' along the bottom of the view.
-
Enter a name for the view and click on Create.
-
Saved camera views are available from within the right hand panel under the 'Camera Views' menu option.
Sharing a Section View
-
Access the saved camera view from within the right hand panel 'Camera Views' menu option.
-
Against the desired camera view, click on the share icon.

-
Enter the user(s) names with who'm you wish to share the view.
-
Click Share.
-
Recipients will receive a notification and the view will be available to them within their Camera View list within the right hand panel. The view will indicate who it was shared by.

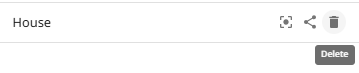
Deleting a Section View
-
Access the saved camera view from within the right hand panel 'Camera Views' menu option.
-
Against the desired camera view, click on the trash can icon.
-
Confirm the deletion.
Updated over 1 year ago