
Creating Assets

Creating Assets
-
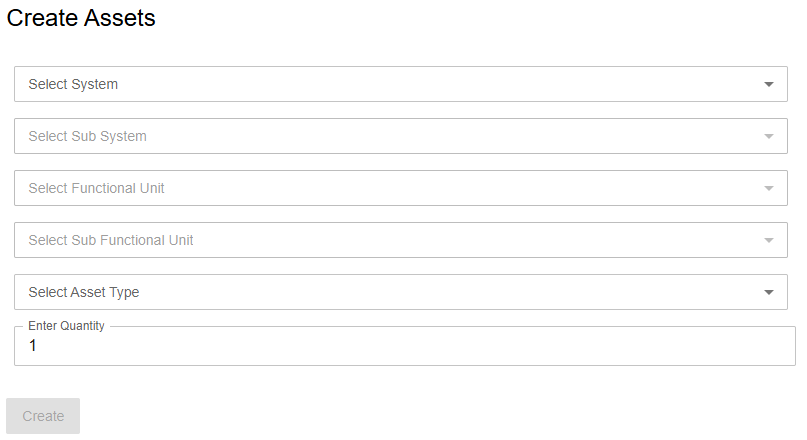
Select Create Assets within the top menu bar
-
Use the class hierarchy fields to select the class hierachy and final class you wish to create assets for
-
Once your asset class is selected, enter the quantity of assets you wish to create
-
Click create
You will receive a toast notification informing you that the creation process was successful -
Your new assets will now have been created within a work in progress changeset
Before they are available to the wider project the changeset will need to be published -
Select the change approvals menu option

-
Locate the changeset containing the new assets
You can view the contents of the changeset by clicking upon its name. This will open the changeset in tree view and you can switch to table view to see more detail -
To publish the new assets click on Publish against the changeset
After a few seconds the changeset will be published. You can click on Refresh table to see that it has now cleared from the work in progress table.
The new assets can now be viewed and edited by the wider project.
Assets can also be created through a Generic Asset Data ImportRefer to Generic Asset Data Import
Updated about 6 hours ago