
Asset Import
Using a Asset Import to Create and Update Asset Records
Accessing Asset Imports
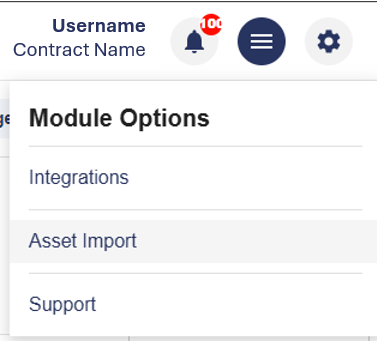
From within the Module Options menu select 'Asset Import’
The Import Configurations List page will then open, displaying any existing configurations along with the option to create new configurations.
Import Types
You can create import configurations to either:
- Import data to existing assets
- Create new assets and assign data concurrently
Import File Preparation
The first file that you use during the creation of an import configuration will form the template file for the import. Therefore you can either use a file that contains no data, with just the attribute fields that you wish to use within the import - this will allow future users of the import configuration to download this empty template file and populate it with their data for upload.
Or, you can use a file that contains data, but this data will remain within the file stored as the template file, so if the template file is downloaded this data will need to be cleared before using the template to import new data.
An import file needs to be of the type: .xlsx (Microsoft Excel)
The spreadsheet data structure should consist of a header row that contains the attribute names for each column of data. This header row is required within the 'Map Sheet' stage of the configuration setup as it is the headers that are mapped to the database attribute fields.
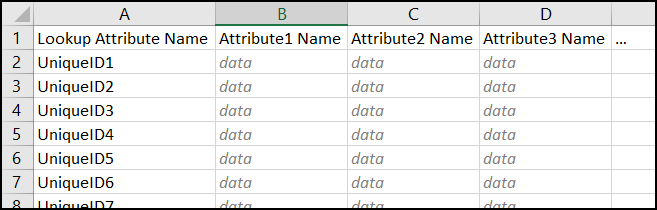
Example Import Data Structure
It is good practice to set the Excel sheet name to something relevant to the import, as the sheet name is also involved within the 'Map Sheet' stage of the configuration setup.
Creating an Import TemplateIf you are not planning to import any data and are just creating an import template, you can upload a file that contains only the header row. This will form a template file users can then download when they intend to use the import to upload data.
Creating a New Import Configuration
Click the ‘Create New Configuration’ button.
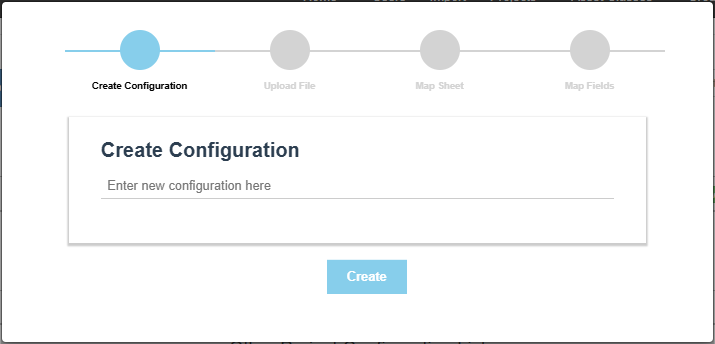
Create Configuration
Enter a name for the configuration and click on Create.
Use a name relevant to the Asset class and data you are importing to make it easier to manage your configured imports.
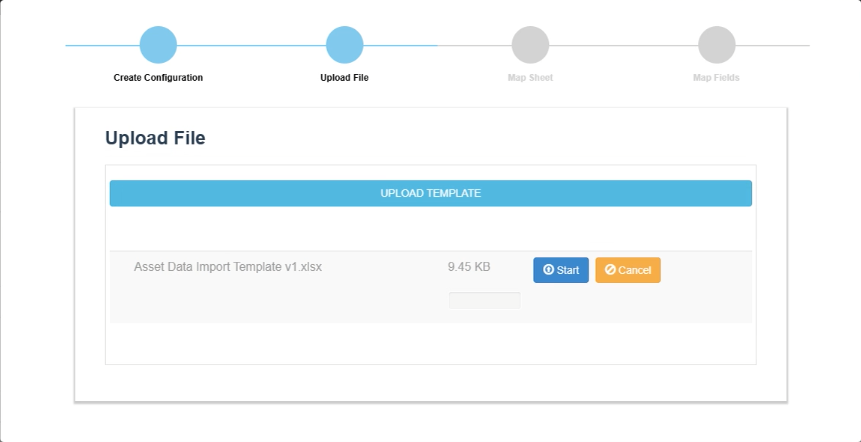
Upload File
Click on ‘Upload Template’ to navigate to and select the file you wish to import.
Upon clicking open on the file browser window and then clicking 'Start' you will see the file upload progress.
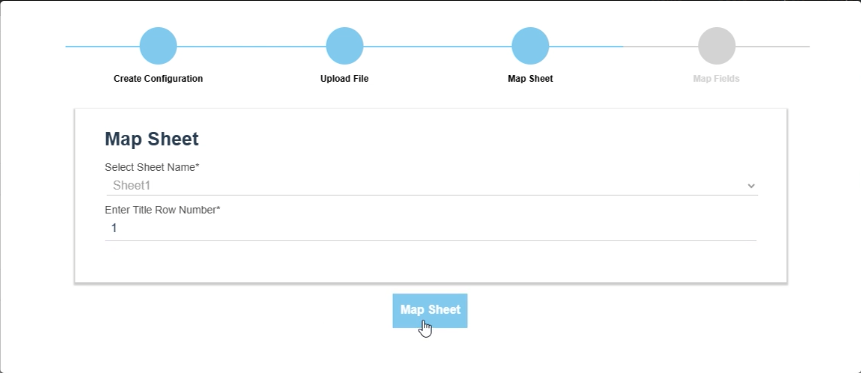
Map Sheet
Select the sheet name that contains your data, and enter the row number for the header row within the import sheet, then click on ‘Map Sheet’.
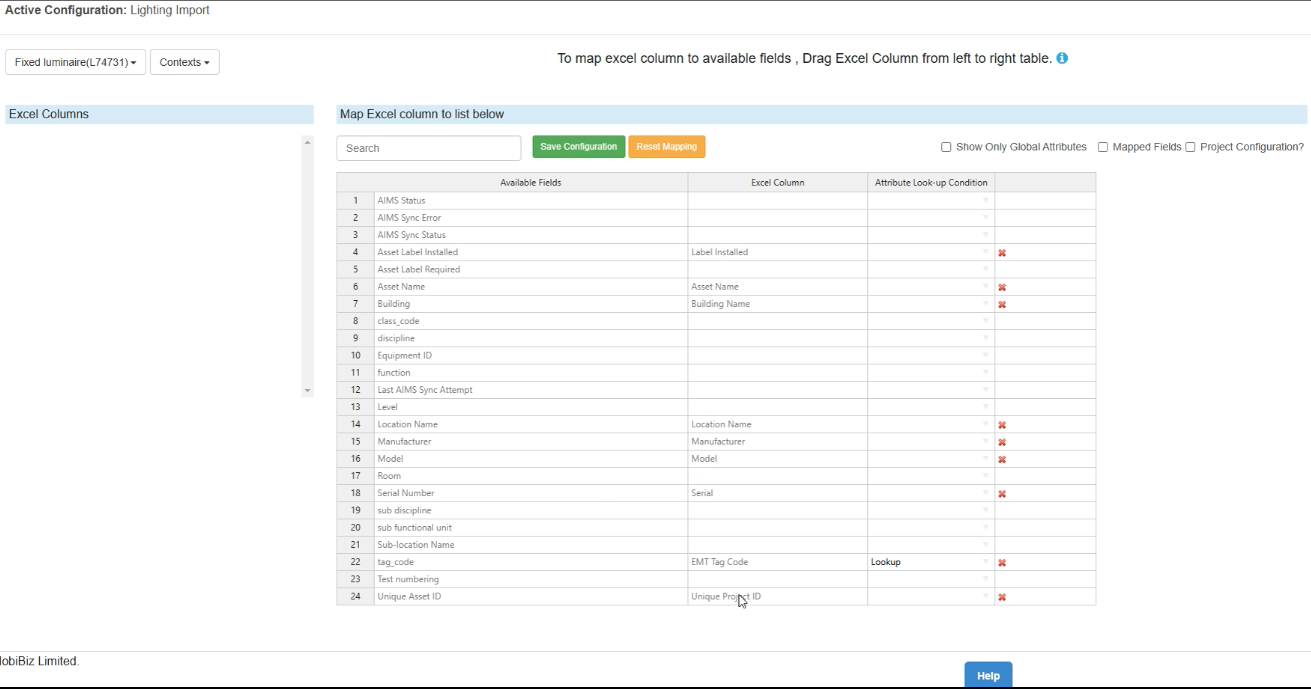
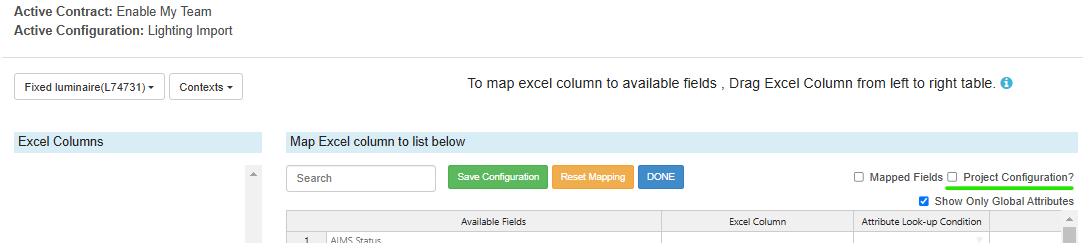
Map Fields
Following the mapping of the sheet, the field mapping page will appear. Here an asset class can be selected and the individual fields from within the import file mapped to their corresponding attributes.
- Select the Asset Class you are importing data for. (Optional)
- If you intend to create assets as part of your import, it is mandatory to select an asset class.
- If you are importing data to existing assets, it is not mandatory to select an asset class.
- To see both global and local attributes within the available fields table, uncheck the 'Show Only Global Attributes'.
You can also filter the available attributes by context. - Map the attributes from your import sheet (lefthand list), by dragging them across to their corresponding attribute within the righthand table.
If you are updating existing assets then you will need to map to a unique ID field and set this mapping as the 'Lookup' within the ‘Attribute Look-up Condition’ column.
(The unique ID field is that which is providing the link between the data being imported and the asset(s) in the system)
Asset Data Imports can also be used to create assetsTo create assets simply ensure that you specify an asset class and exclude a 'Lookup' attribute mapping when configuring the mapping for the import configuration.
A new asset will be created for each row of data within your import file, as well as bringing in any associated data.
- Upon completing the mapping for the fields you wish to import, click on ‘Save Configuration’, and once saved, click 'Done' to return to the Import page.
Your Import configuration has now been successfully set up.

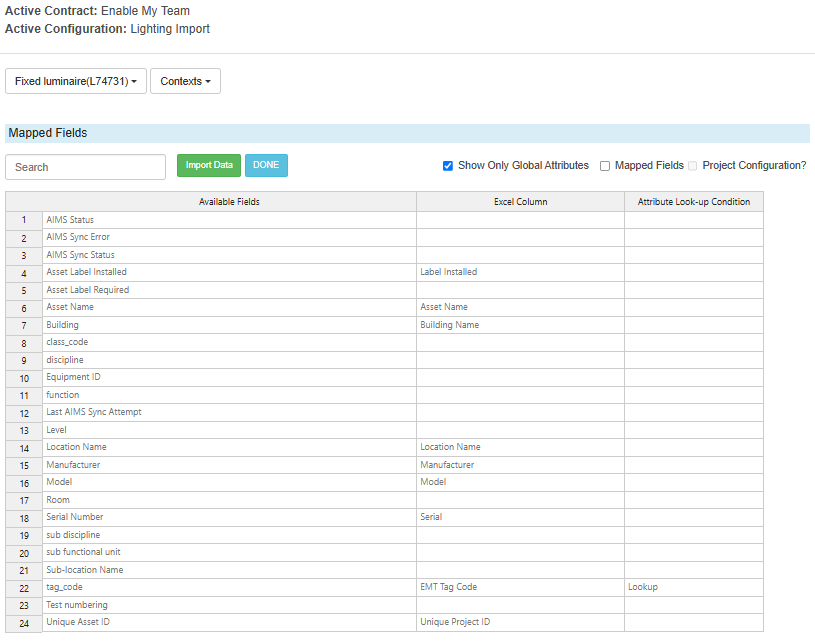
Importing Data
If the template file used in the creation of the import configuration contains data to import, to trigger the import, click on 'View Mapping' against the configuration, and within the mapping screen, select 'Import Data'.

If you have a new file to import against a configuration, first select 'Upload File' against the configuration and follow the steps to upload the file.

It is recommended that you download a copy of the template file associated with the configuration and include your data upon this to ensure that the data will import without issue.
Your import sheet must:
- Use the same sheet name as the template file
- Have a header row in the same row number as the configuration template file
- Contain headers that match those in the template file
Once uploaded, click on the 'View Mapping' button, this allows you to review which fields from your import sheet are mapped. Then click on 'Import Data'.
You will see a prompt indicating the number of records that will be created/updated. Upon confirming, the data will be uploaded into a new changeset.
Once you have completed your data updates and are ready to share your changes to the wider project, you will need to publish your changeset. (see Changesets).
Configuration Types
User Configuration
By default a configuration will be saved as a User Configuration, which is only available to the user who created it.
Project Configuration
To allow a configuration to be used by the wider project, within the field mapping page there is a checkbox option to assign the configuration as a 'Project Configuration'. This option can be toggled at any stage, by any permitted user.
If a configuration has been set as a Project Configuration, and subsequently a user unchecks the Project Configuration option, the configuration will revert to a User Configuration under the user who initially set up the configuration, and means that the configuration will no longer be available project wide, unless it is set as a Project Configuration once again.
Other Project Configuration
If you have multiple projects/contracts within EMT AIMS and they have Project Configurations defined, then these will appear for use within this section.
Updating A Configuration Template File
To update the original template file used to create a configuration, select 'Edit Mapping' against the desired configuration. Within the mapping page, beneath the configuration name in the top left, click upon the 'Update Template File' button.
Select and upload your new template file.
Following the upload, any new and unmapped fields will appear within the 'Excel Columns' list. These can be mapped by dragging individual fields across to the corresponding attribute within the righthand table.
Obsolete Field MappingsIf there are existing mappings that are no longer required or exist within the new template, these can be removed manually by clicking the red cross against mapping.
Once the update is complete, click on 'Save Configuration'
Workbook Configurations
Workbook configurations allow the grouping of existing project configurations so that a multi tab workbook can be uploaded and a single import run that will involve all configurations within the group, provided that the tabs in the workbook are named as required by the respective individual import configurations.
Creating a Workbook Configuration
- Select 'Create Configuration Workbook'
- Enter a name for the Workbook/group
- Select the individual preconfigured import configurations to include within the workbook group
- Click 'Save'
- The new group set will appear at the bottom of the Project Configuration List
Using a Workbook Configuration
- Click 'Upload Workbook'
- Select the file you wish to use for the import
- Click 'Start' to load the file
- The mapping screen will then open. Here you can view the mappings for the individual configurations within the group, and trigger your import by clicking 'Import Workbook'
- A status table will then display to indicate the processing status of the import
- Once complete click on 'View Changeset' to go to the changeset created by the import
- Once you have completed your data updates and are ready to share your changes to the wider project, you will need to publish your changeset. (see Changesets).
Editing a Workbook Configuration
- Click 'Edit' against the group row
- You can update the workbook name, select additional configurations for the group or remove existing selections
- Click 'Save' after completing any changes
Deleting a Workbook Configuration
- Click upon the 'Delete' button for the group row
- Confirm the deletion
Deleting a Workbook Configuration will not delete the individual configurations held within the group, these will remain available.
Updated 6 days ago